Creating Requests
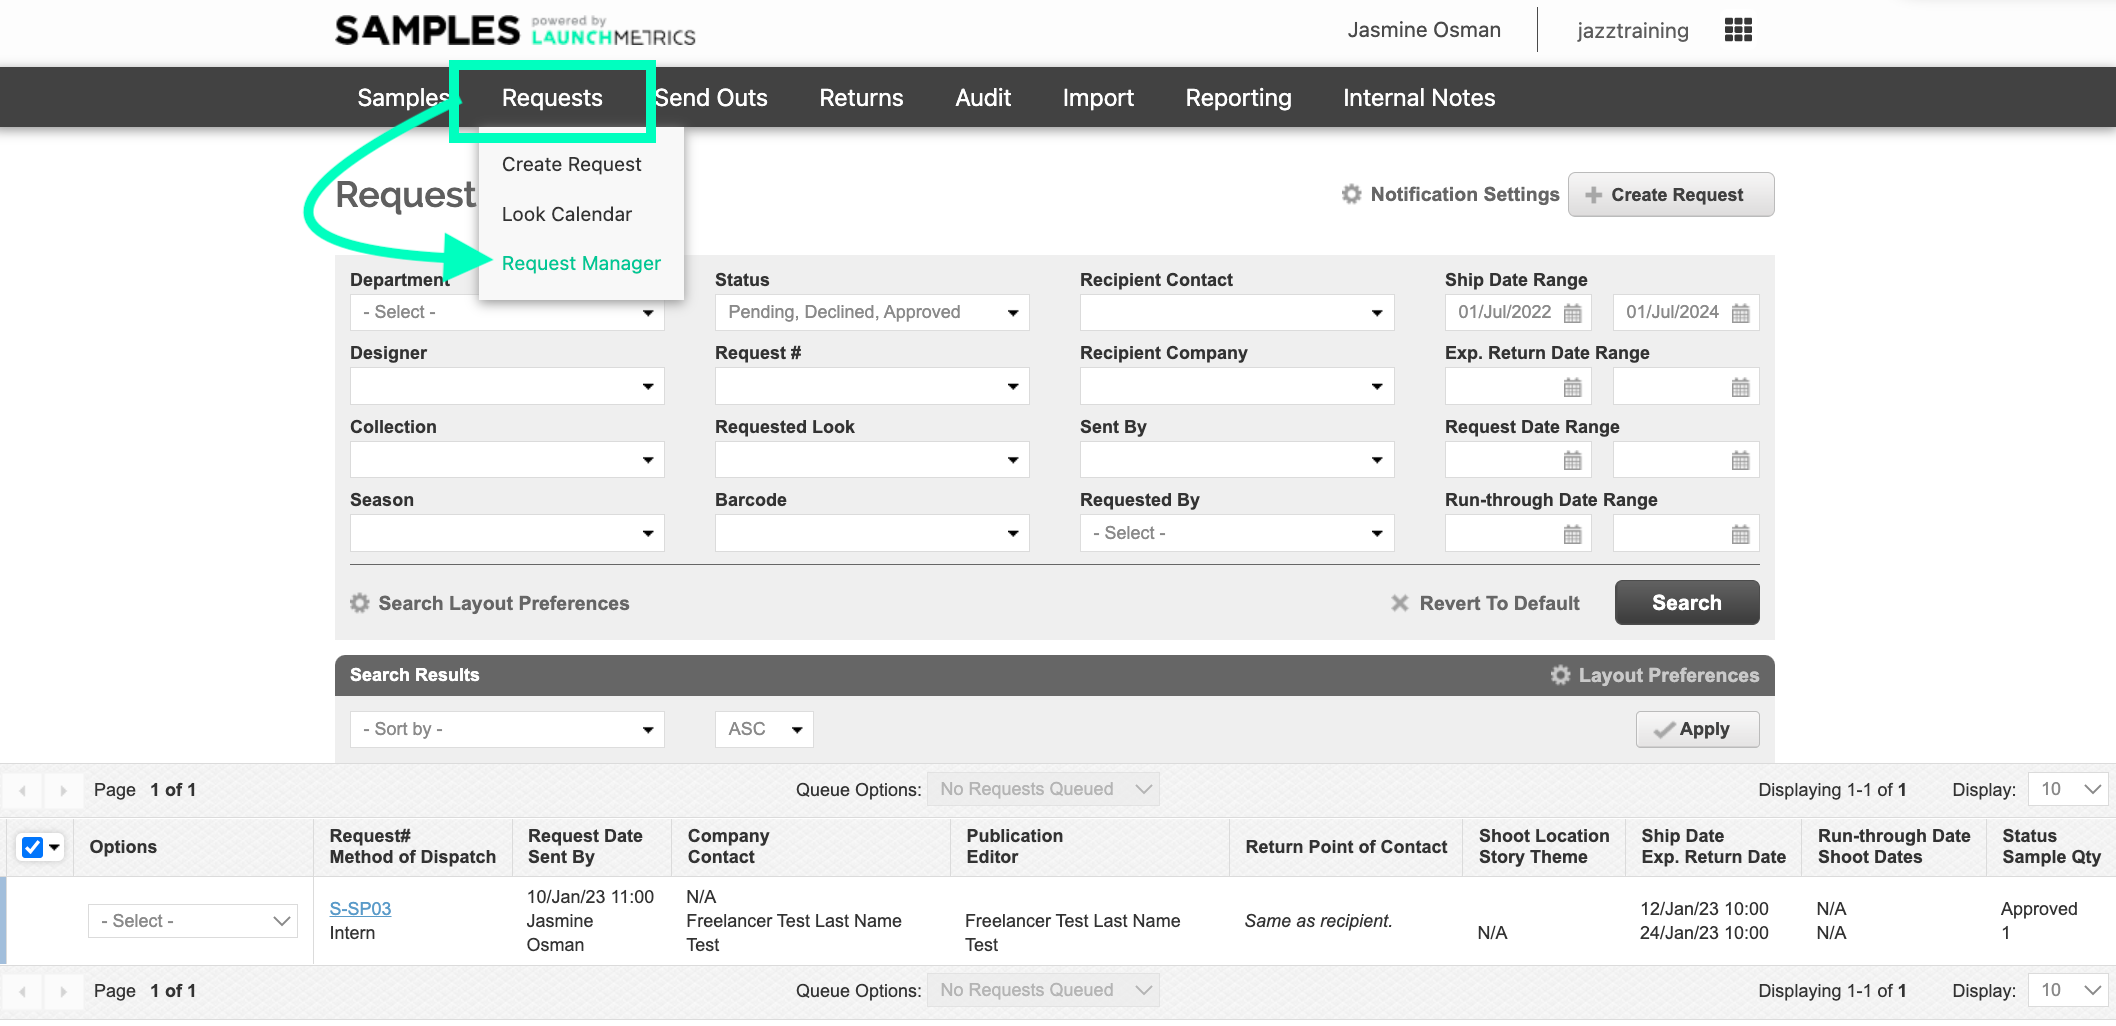
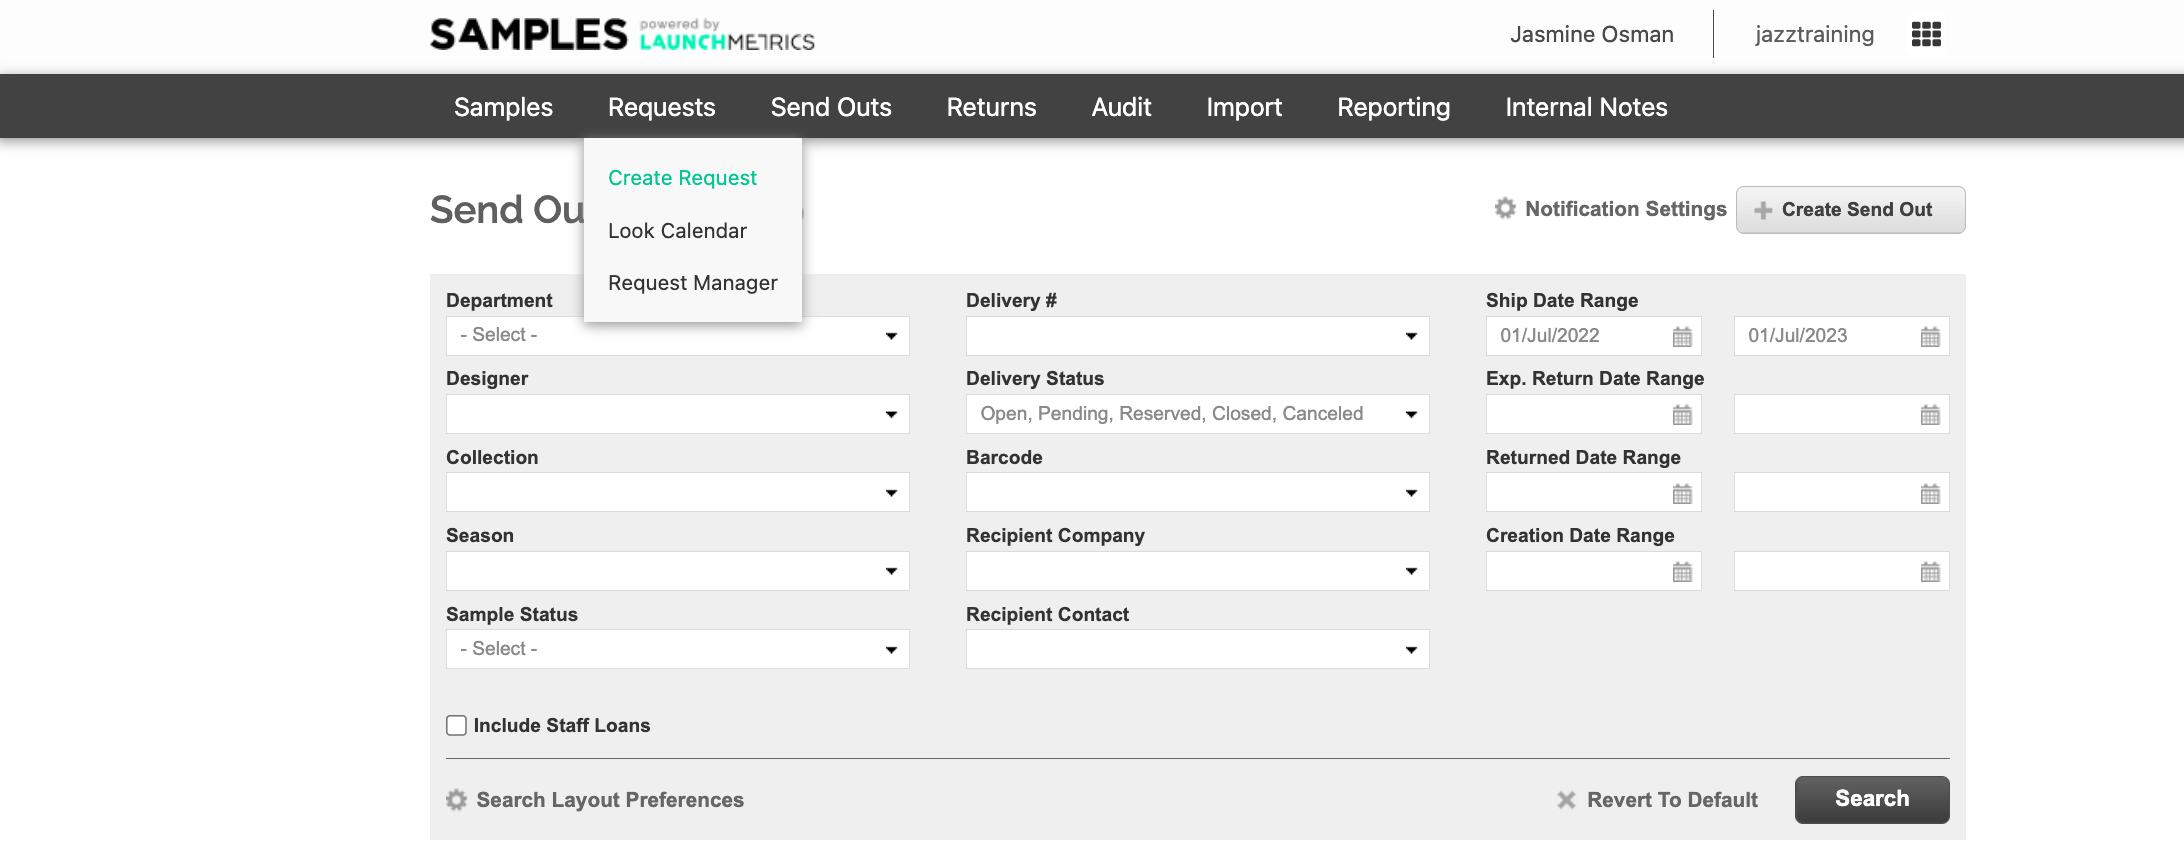
- Hover over your main Requests Tab and select "Create Request".
-
Within Requests you have three steps:
- 1. Details of the requests
- 2. Requested Items
- 3. Review & Convert
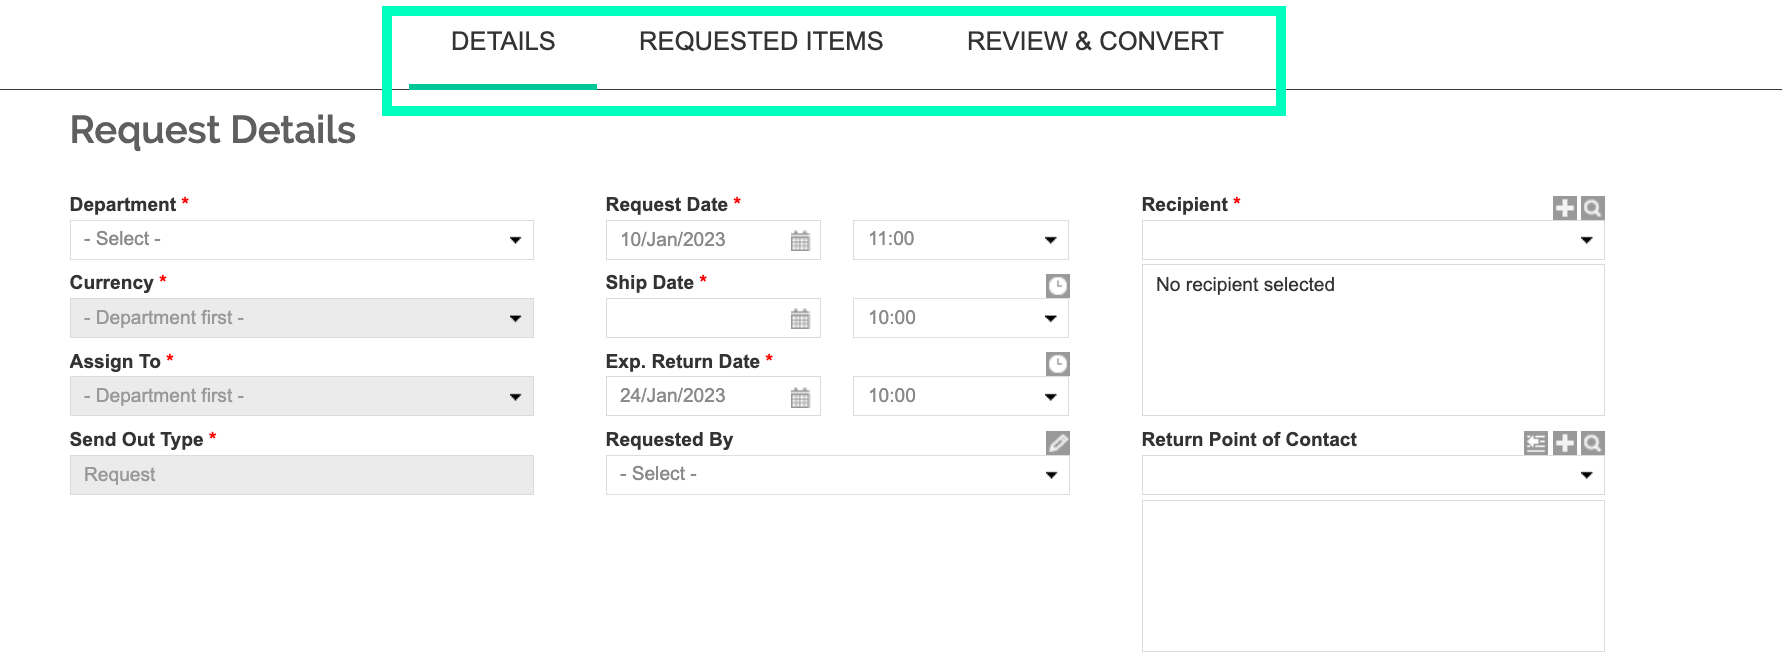
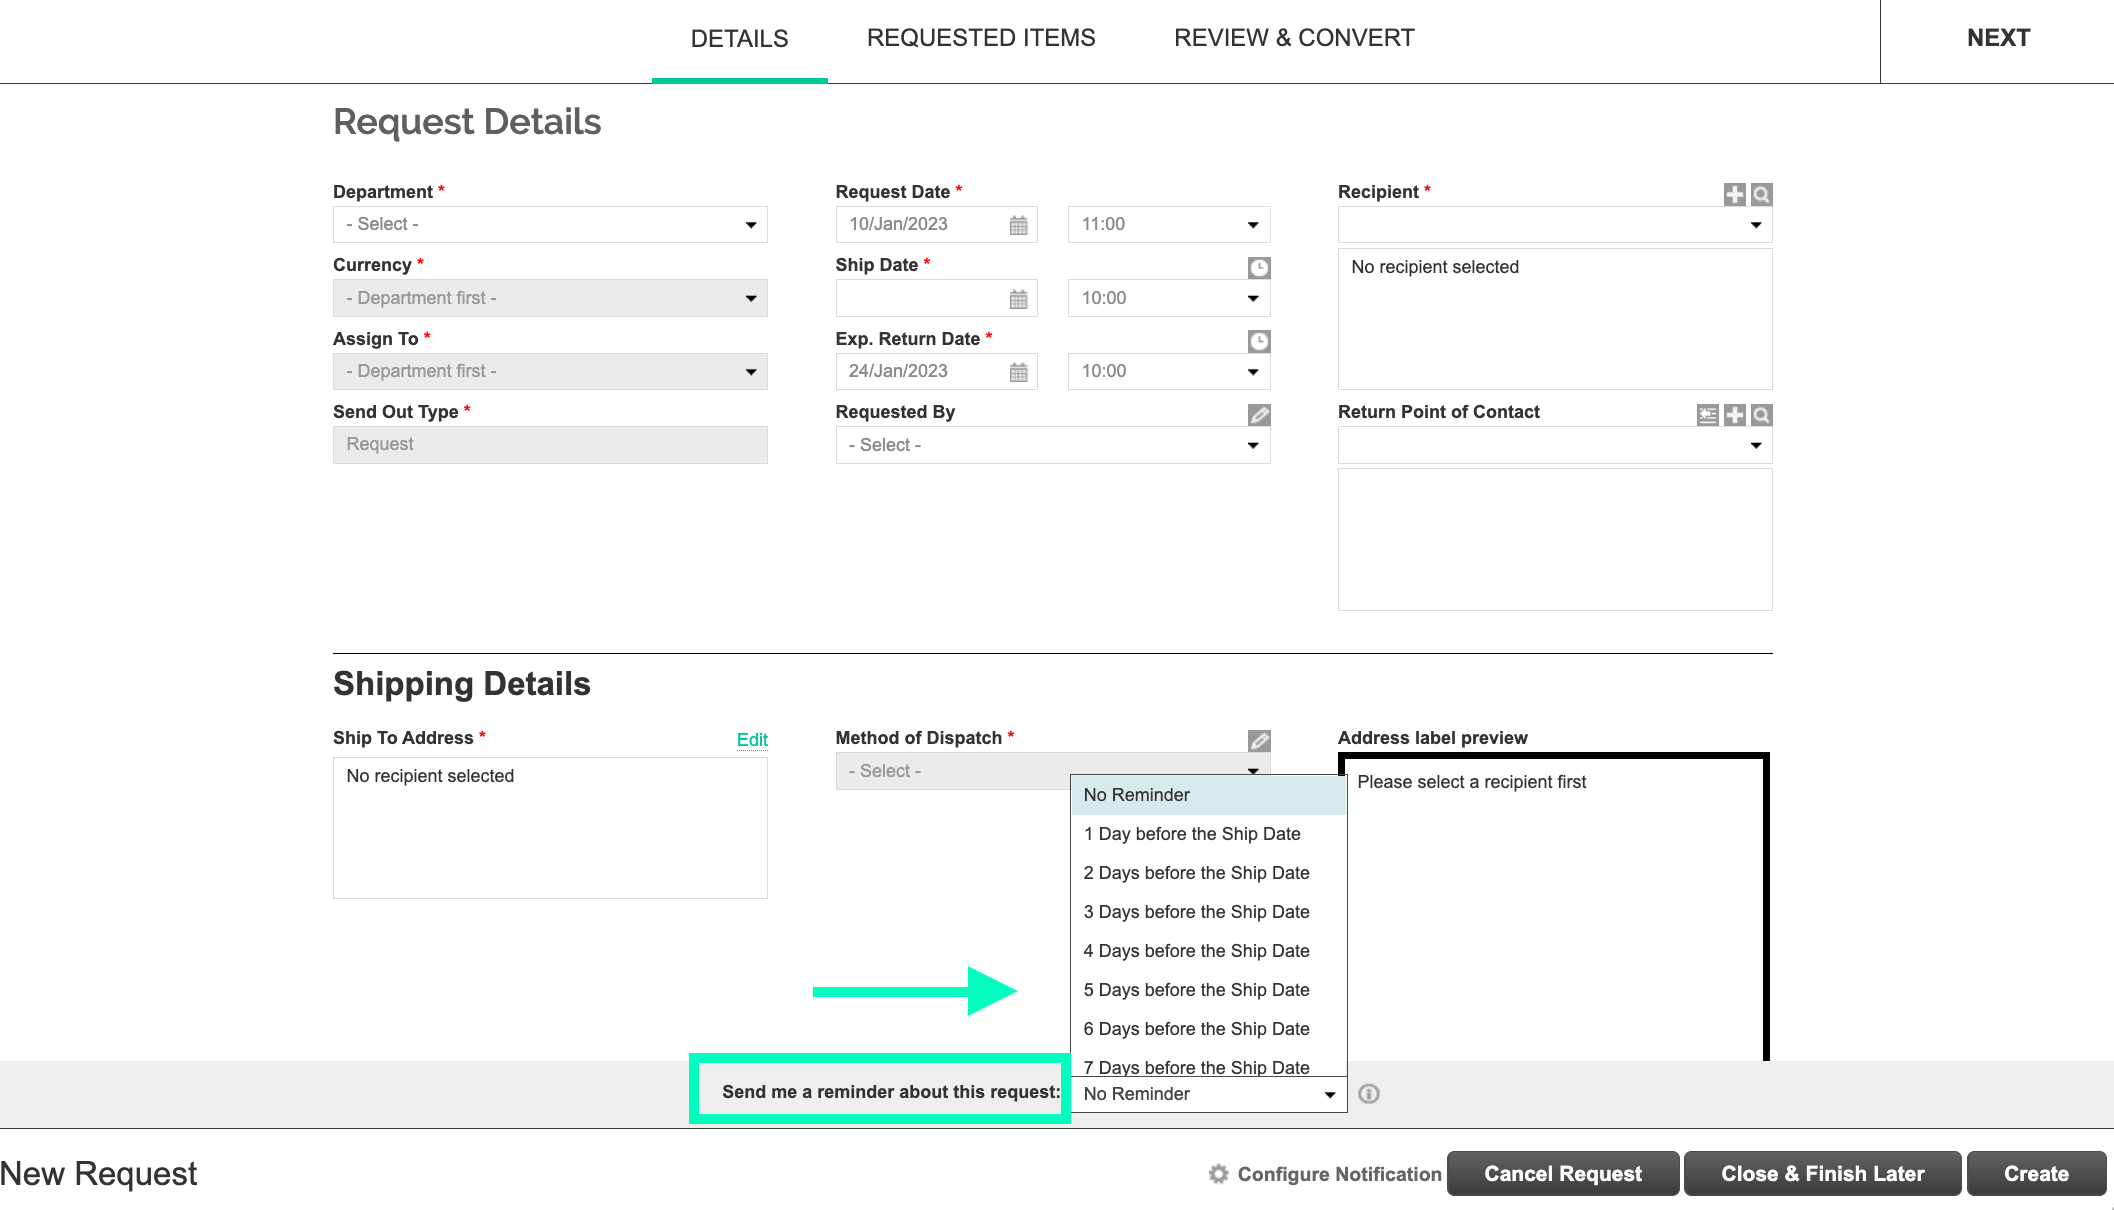
Details
- Fill out as much information as you can in this section
- NOTE: all fields with a red asterisk are required.
Setting Reminders
- Scroll to the bottom of the page and select the "Send me a reminder about this request" drop down menu to set a reminder about the request you're creating. This reminder will be sent to your inbox (The email will be sent to the email address assigned to your username). This can be a general reminder, or if you'll be adding samples at a later date.
- You can set the reminder between 1-7 days of the ship date.
- Below your reminder drop down menu, you'll see "Configure Notification" with a small cog icon. This display's the list of users subscribed with the ability to add additional recipients.
-
Once you've filled out all the required fields (marked with a red asterisk*) you have 4 options:
- Requested Items (Add Samples to your request). This is located at the top of the page.
- Cancel Request (Request is not created)
- Close & Finish Later (This will save the data and allow you to continue your request later).
- Create (Creates your request, you can add samples to the request at a later date)
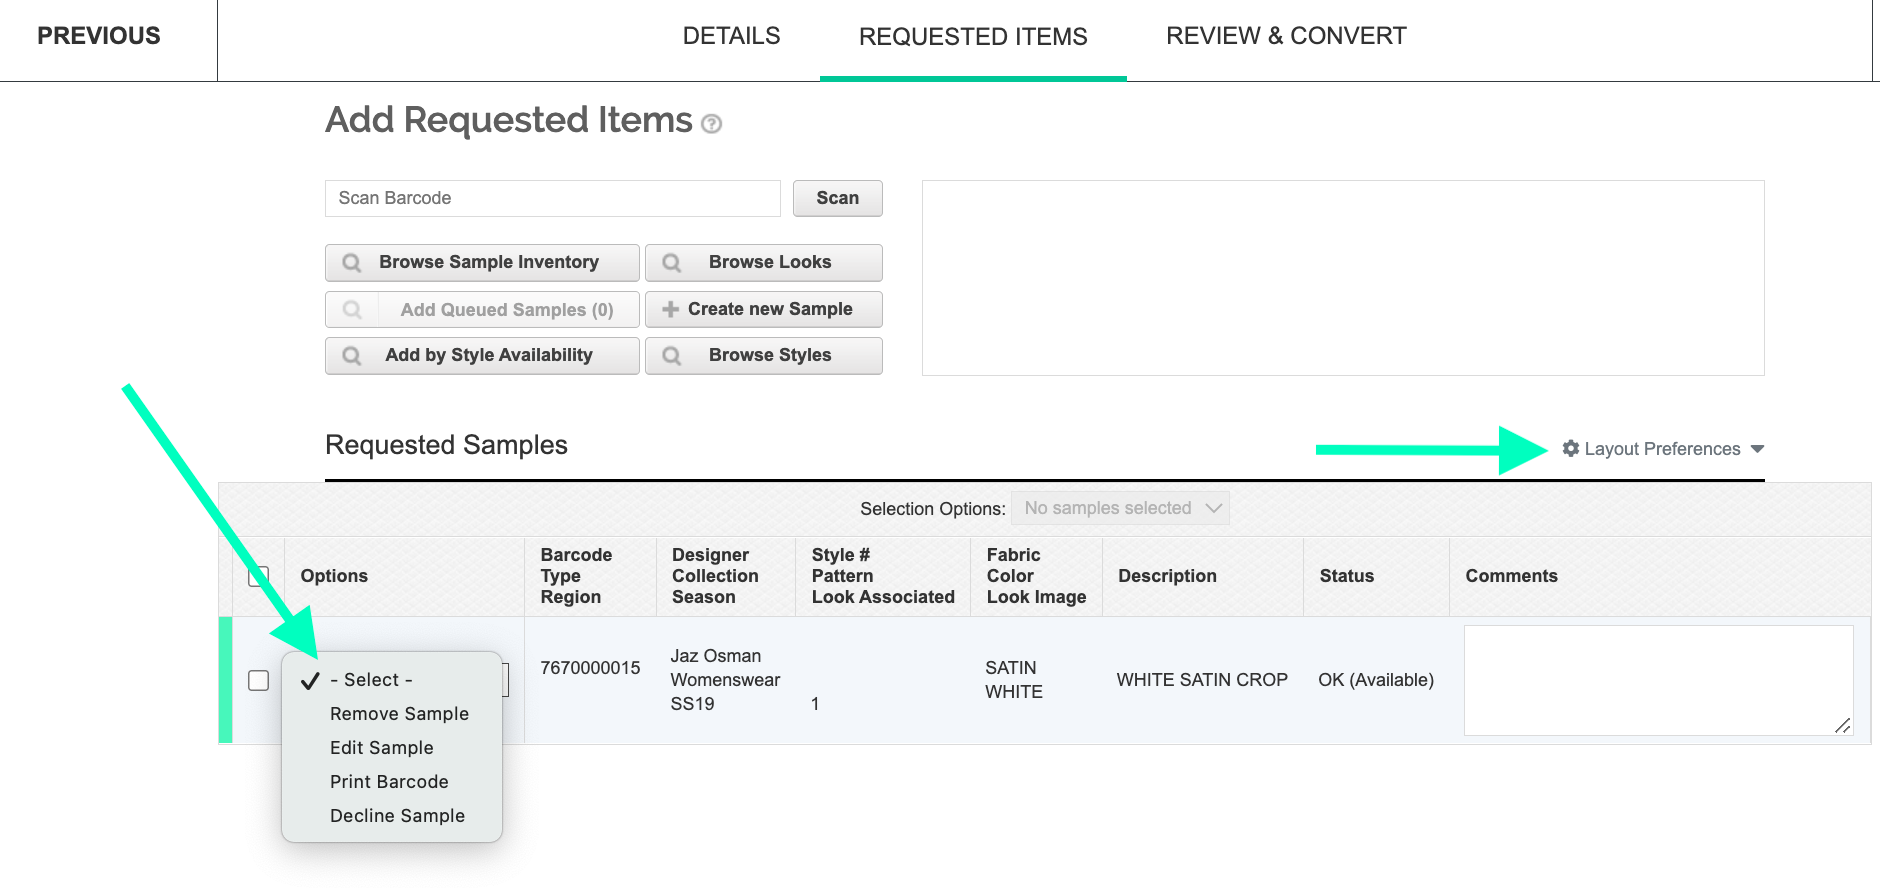
Requested items
-
In this section you'll add the Samples to your request, you can do this by:
- Scan Barcode (Input the barcode by typing the barcode # or scanning it in with your USB scanner).
- Browse Sample Inventory (Browse for your samples in your Samples Manager).
- Browse Looks (Browse for your samples via look numbers).
- Add Queued Samples (Add Samples you have added to your queue in Samples Manager).
- Create new Sample (Create a new Sample that is not in your inventory on the spot to add to your request).
- Add by Style Availability (Browse for styles to check availability).
- Browse Styles (Add a style to your request).
- NOTE: When a sample is scanned, the style number of that sample is added to the Request, and any other sample with the same Style # appears to scan as well.
-
NOTE: Style consists of a Style Number and a Brand/Designer.

- Once you're done adding your Samples to your request you can action the following:
-
Find your Samples linked to requested Look/Styles
- You can do this by clicking "Find Samples" on the left hand side of your screen beneath the Requested headers (shown below).
-
Remove or Decline a Look or Sample
- You can do this by clicking the three dots on the left hand side of the sample headers (shown below).
-
Change your layout preference
- You can do this by clicking "Layout preferences" and dragging in the required fields into your "selected headers". (shown below).
- NOTE: You can add the "Comments" field into your layout preferences, this is an editable field at this stage.
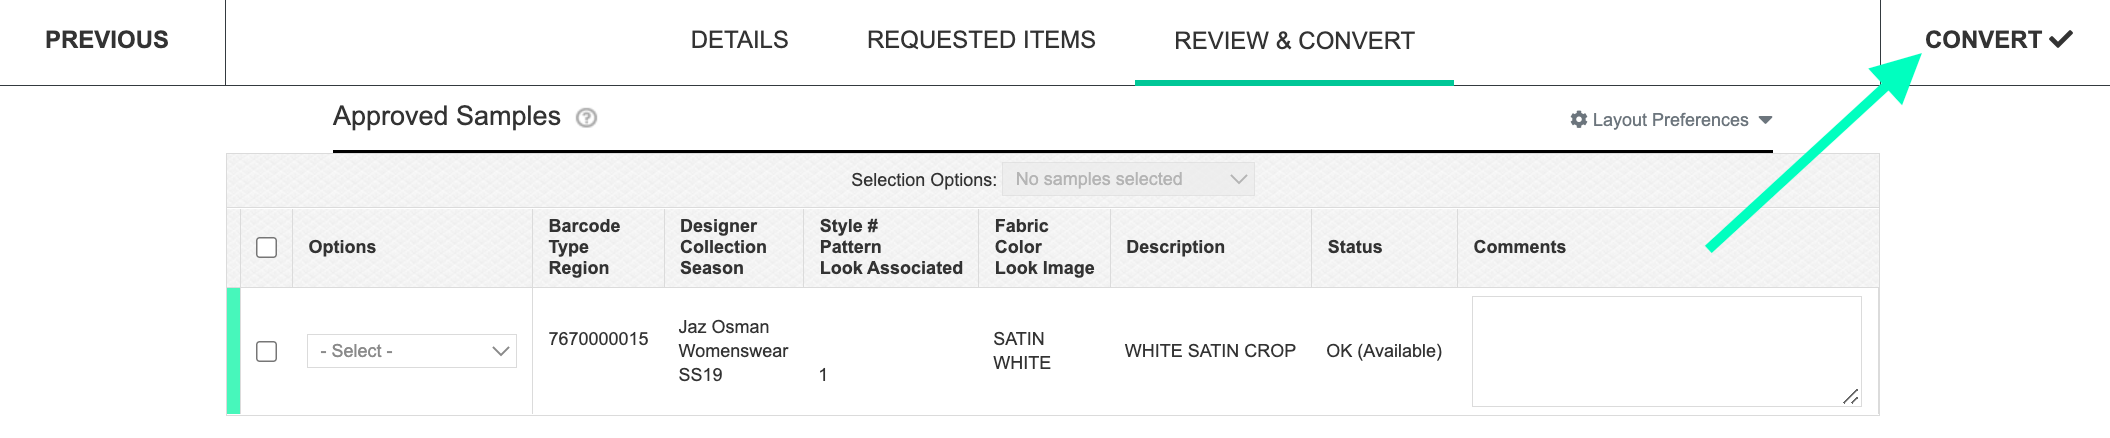
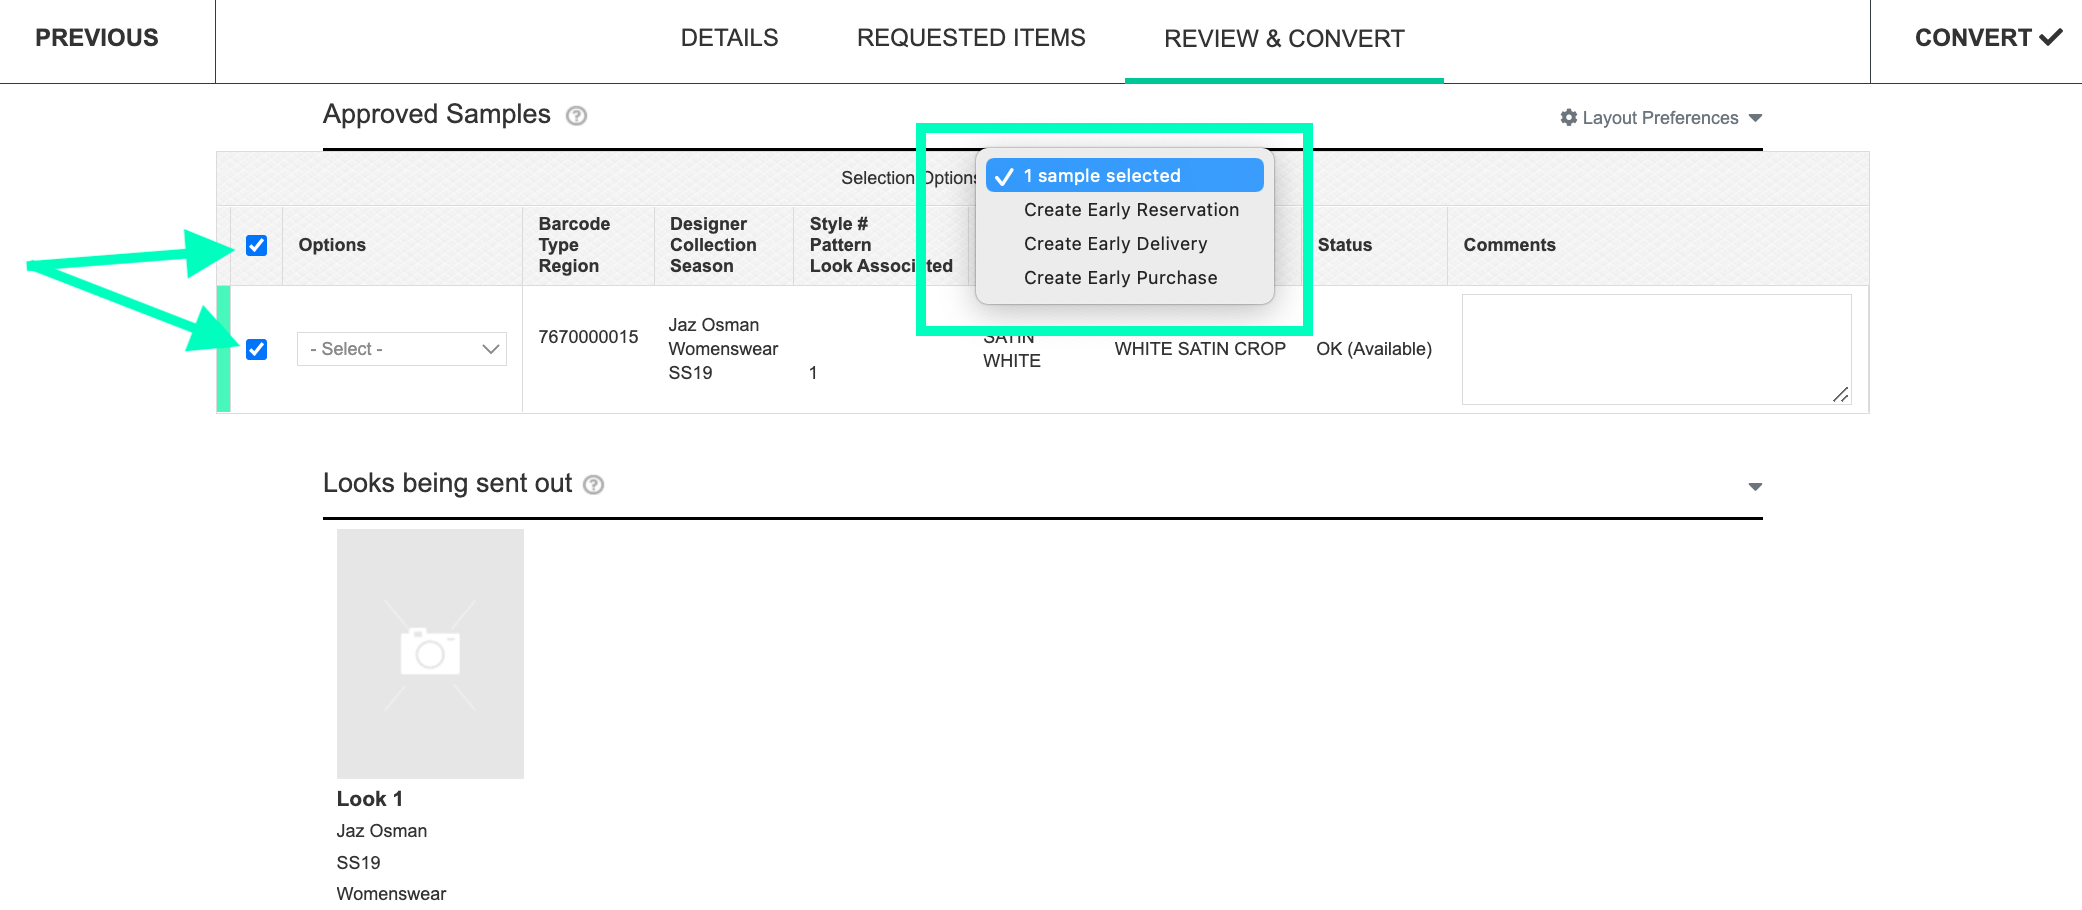
Review & Convert
- On this page you'll review your request and click "Create" once you're happy with the details.
- Alternatively you can create an early reservation, delivery or purchase.
- You can do this for specific Samples or for all samples on your request by using your check boxes and queue options as shown below.
-
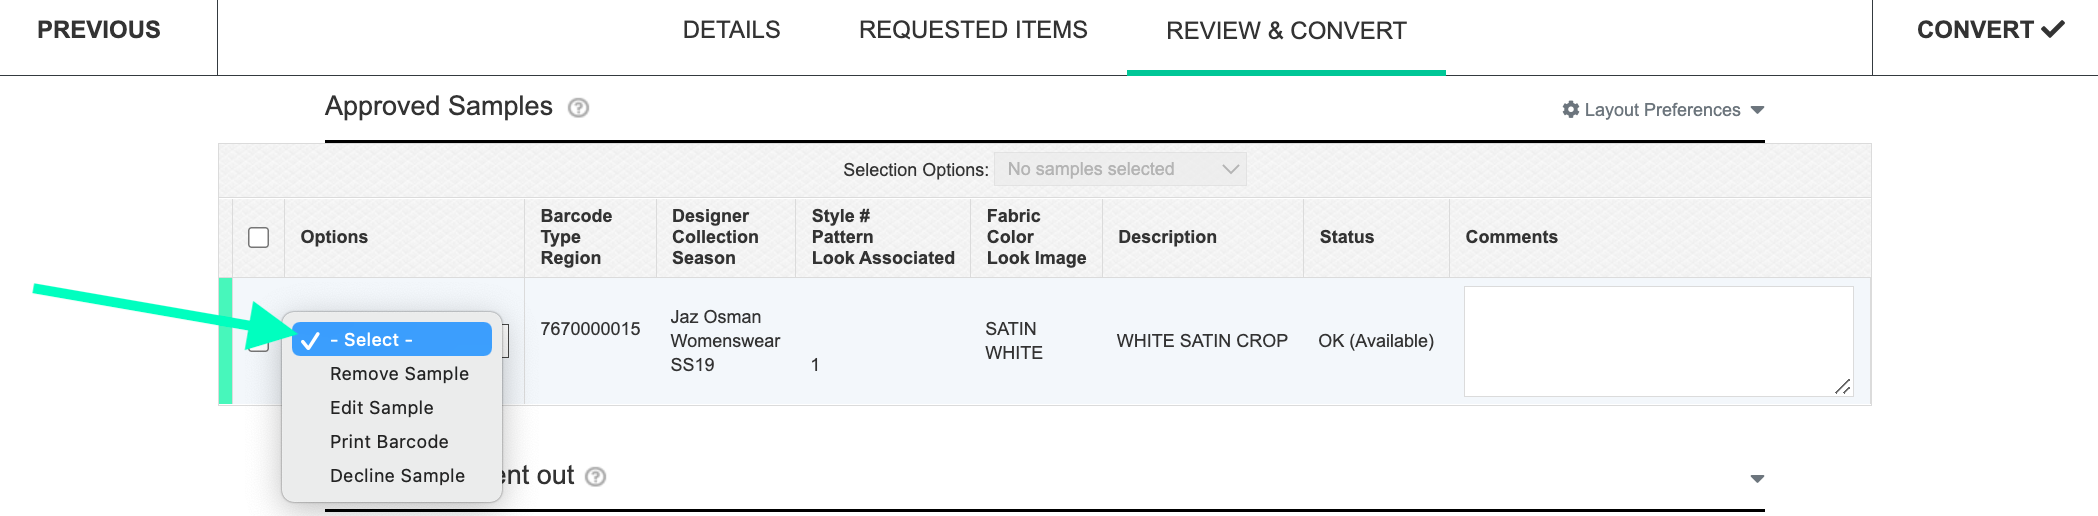
You can also do the below actions per sample by selecting the queue options drop down menu on the left hand side of each sample.
- Remove Sample
- Edit Sample
- Print Sample
- Decline Sample
- Your request will now be available to search in your Request Manager.