Open the Font Settings Dialogue
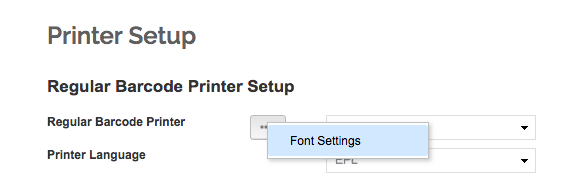
- Firstly, ensure you have a printer selected & a printer language selected. Select EPL if you are not sure.


- The 3 dots button should appear if both options are selected
- Click to open the Font Settings Dialogue

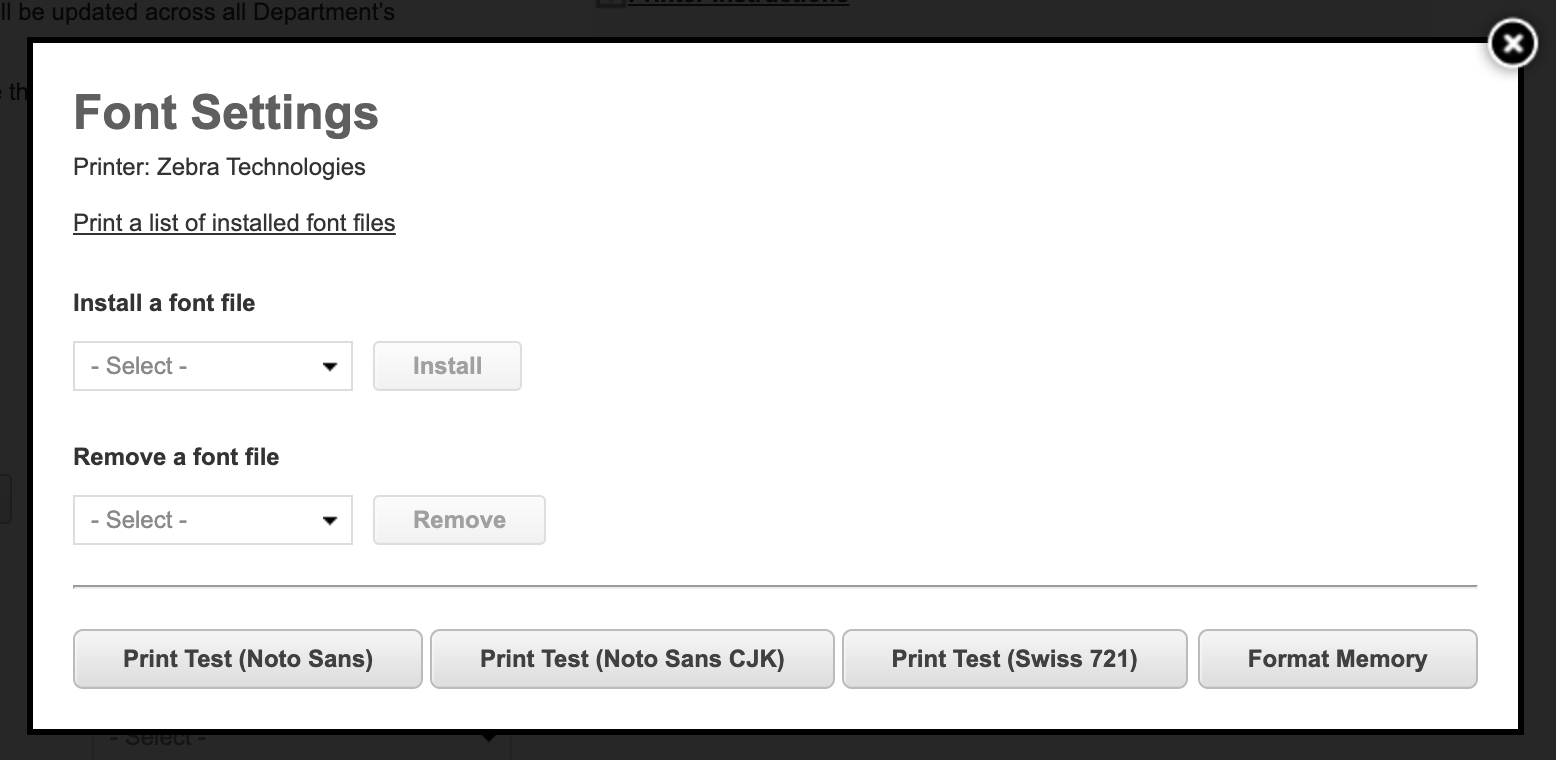
 If using ZPL
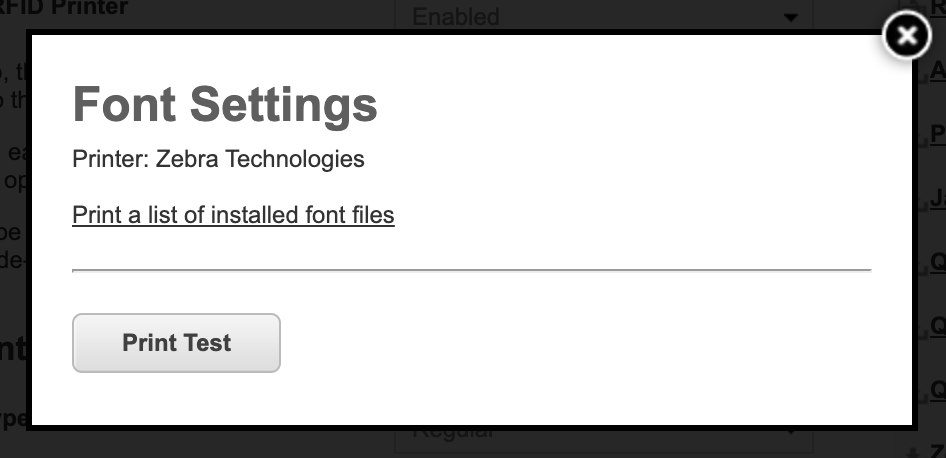
 If using EPL
Print a list of installed fonts
Printing a list of fonts is the only way to see what fonts are already installed on the printer, or to verify the existence of newly installed fonts.
This function is available for both EPL and ZPL Printer Languages
- From within the Font Settings Dialogue, click "Print a list of installed font files"

Install a Font File
The system provides a short list of fonts that you can install onto your printer.
Barcode Printers — available for ZPL
Address Printers — available for both EPL & ZPL

- From the Font Settings Dialogue > Under Install a font file > Select the font you want to install
- Click Install
Remove a Font File
Removing a font file would only be required for freeing up some memory in order to upload some other file (font or logo).
- Barcode Printers — Available only for ZPL
- Address Printers — Available for both EPL & ZPL
- From the Font Settings Dialogue > Under Remove a font file > Select the font you want to remove
- Click Remove
Print a Test Label
This is how you can verify that the recently installed font works
- Available for both EPL and ZPL.
- From the Font Settings Dialogue > At the very bottom you will see buttons to print test labels.
When the selected Printer Language is ZPL, there are two buttons available, for testing each available font respectively.

