
Archiving Samples
There are a few reasons why you should consider Archiving your Samples, as opposed to deleting them.
-
Organised Inventory Management: Archiving samples that have reached the end of their useful life or are no longer needed for active usage helps maintain an organised inventory and reduces clutter in active storage areas.
-
Reporting: Even after archiving, you can still report on the sample's activity if you choose to display or focus on archived samples.
-
Recovery: Archived samples can be recovered via the End of Life Manager if needed in the future.
-
Preservation of History: Unlike deleting, archiving does not permanently remove the sample from the system. This means the sample's history is preserved and can be accessed if required. Remember, deleting a sample will permanently remove it from your inventory and any associated activity such as sample loans, event history will be anonymous. Therefore, archiving is a safer and more flexible option.
How to Archive your Samples
- Within Sample Manager, Search for the samples that you plan to mark as archive.
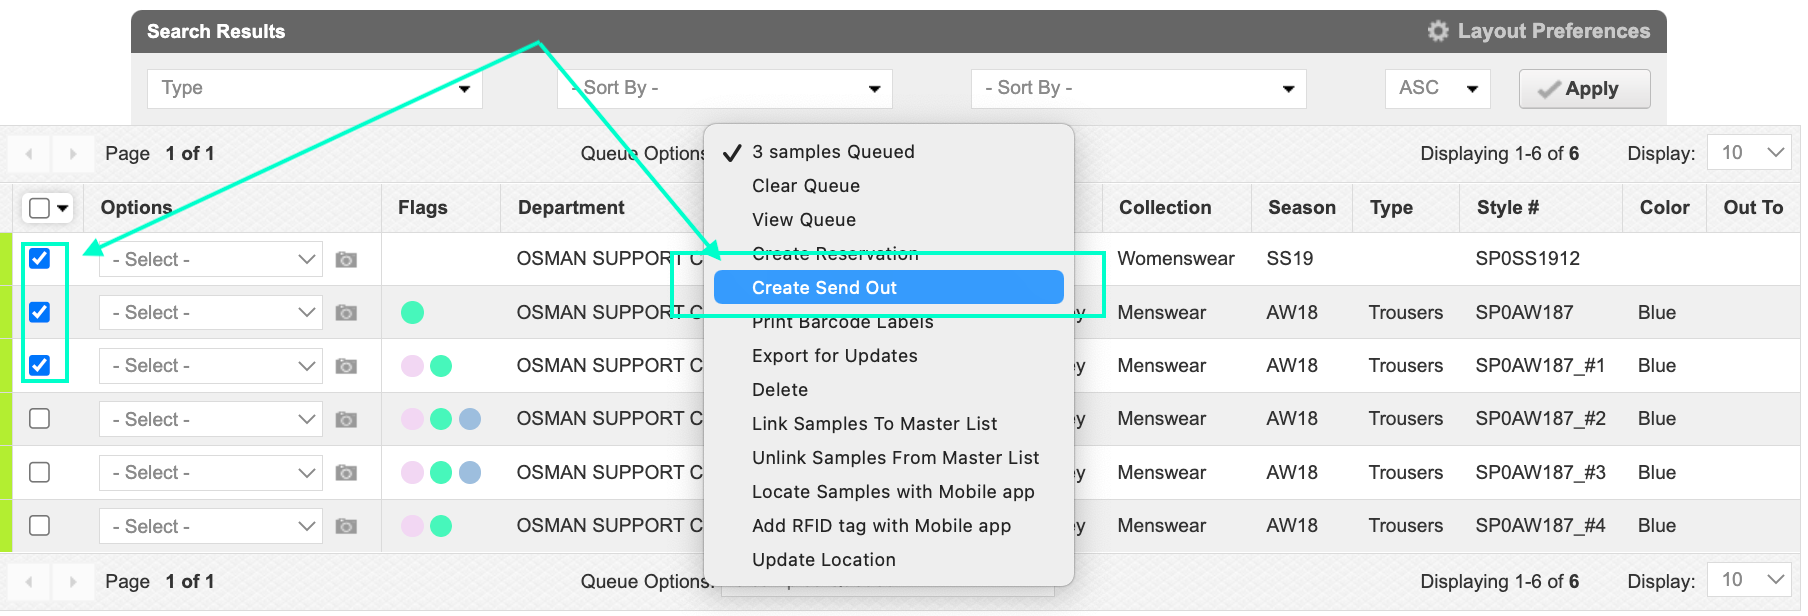
- Queue the specific samples you wish to archive by ticking the check boxes on the left hand side of the samples.
- If you plan on archiving an entire season, you can search for this season and queue all found samples by clicking the small arrow pointing downwards on by the first check box, followed by clicking "All Found Samples".
- Confirm these are the correct samples and click your "queue options" drop down menu which is located above your search results and click "Create Send Out".
- Please make sure to clear your queue before beginning to queue new samples to avoid queuing the incorrect samples.
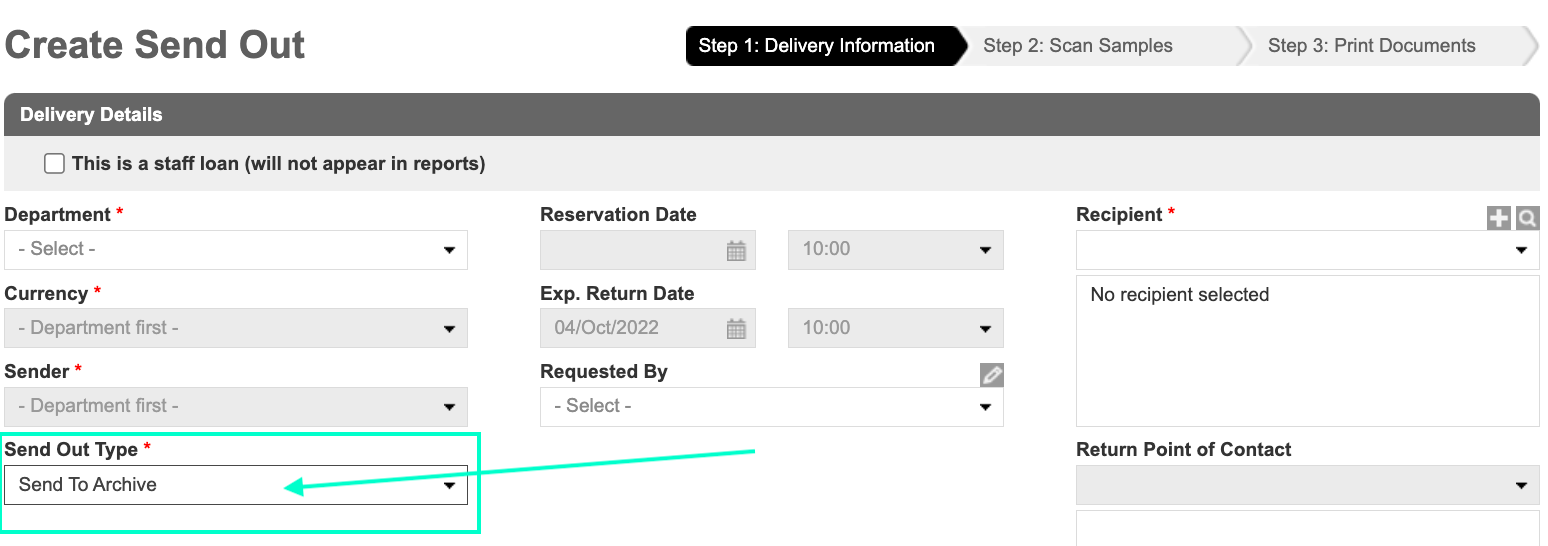
- This will bring you to the Send Out Window
- To indicate you are sending your Samples to your Archive, you will need to click the "Send Out Type" drop down menu and select "Send to archive".
- When you have finished filling in the information you can continue to the next step by selecting "Next Step"
- This will bring you to a new window showing you the samples you are sending to Archive, along with any error messages.
- NOTE: You can remove samples from your archive list by selecting the drop down menu on the left hand side of the samples and clicking "Remove Sample". You can also print the barcode by using the same action.
- You can add additional samples from Inventory if you've forgotten any by selecting "Add from Inventory".
- Once you've confirmed you have all the required samples scanned, you can click "Next Step". You'll be able to print the delivery memo and other documents from this page.
- You're still able to run reports on your archived samples by navigating to "Send Out Reports " and selecting "Sent To Archive" in the "Sample Status" drop down menu.
- You can also manage your archived samples in "End of life manager " which is located in your main Samples drop down menu tab. You'll have the option to view sample images, view sample details and recover your archived samples.
- Unarchiving a sample will place the sample back into your inventory and will be available to use.