
Invitee Automated Emails can be an important tool to ensure clear communication with Invitees of your event. This article will outline the feature around managing and utilizing Automated event emails.
Remember
Some automated emails (Confirmation Yes, Confirmation No, and Guest Confirmation Yes) are automatically enabled for all events, so it is important to remember to customize the look and feel to match that of your event or brand BEFORE sending invitation emails.
Where to find it
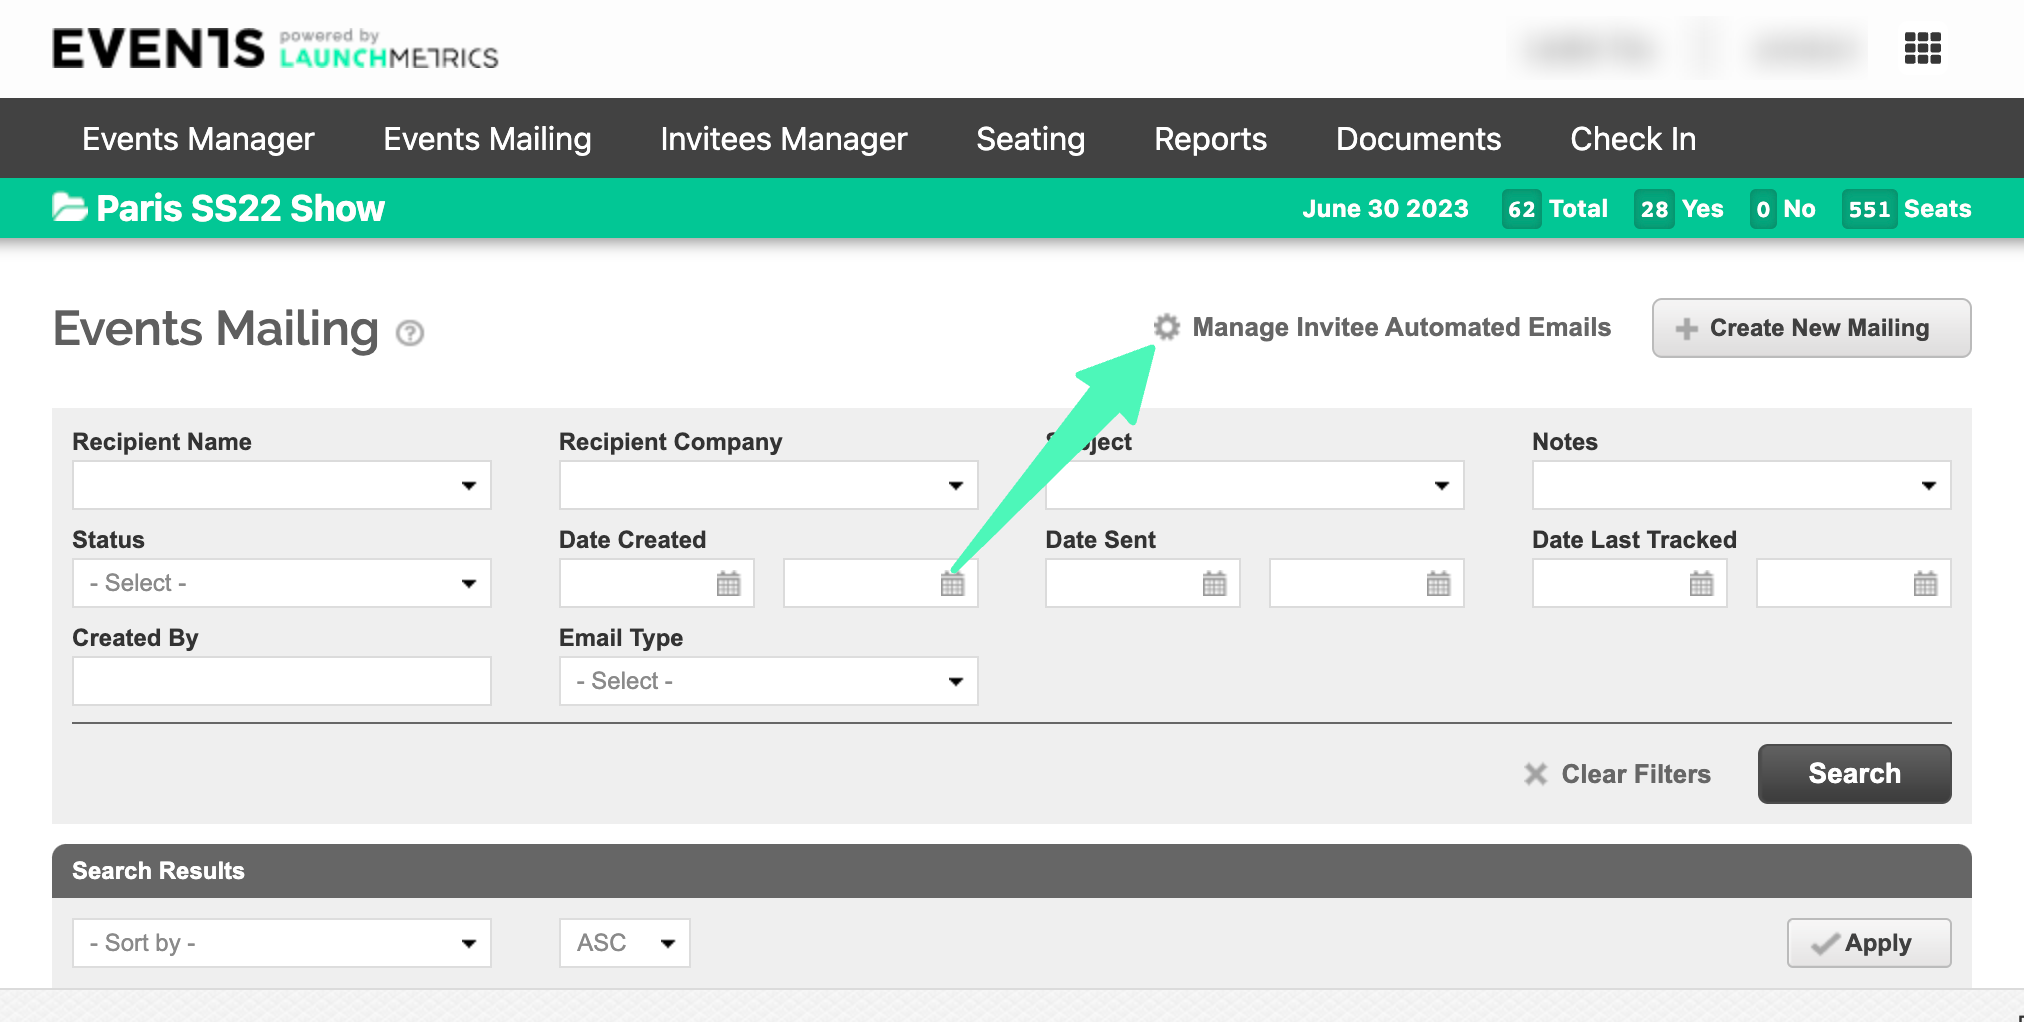
- Navigate to Events Mailing
- Click on the button called “Manage Invitee Automated Emails” at the top of the page
How they work
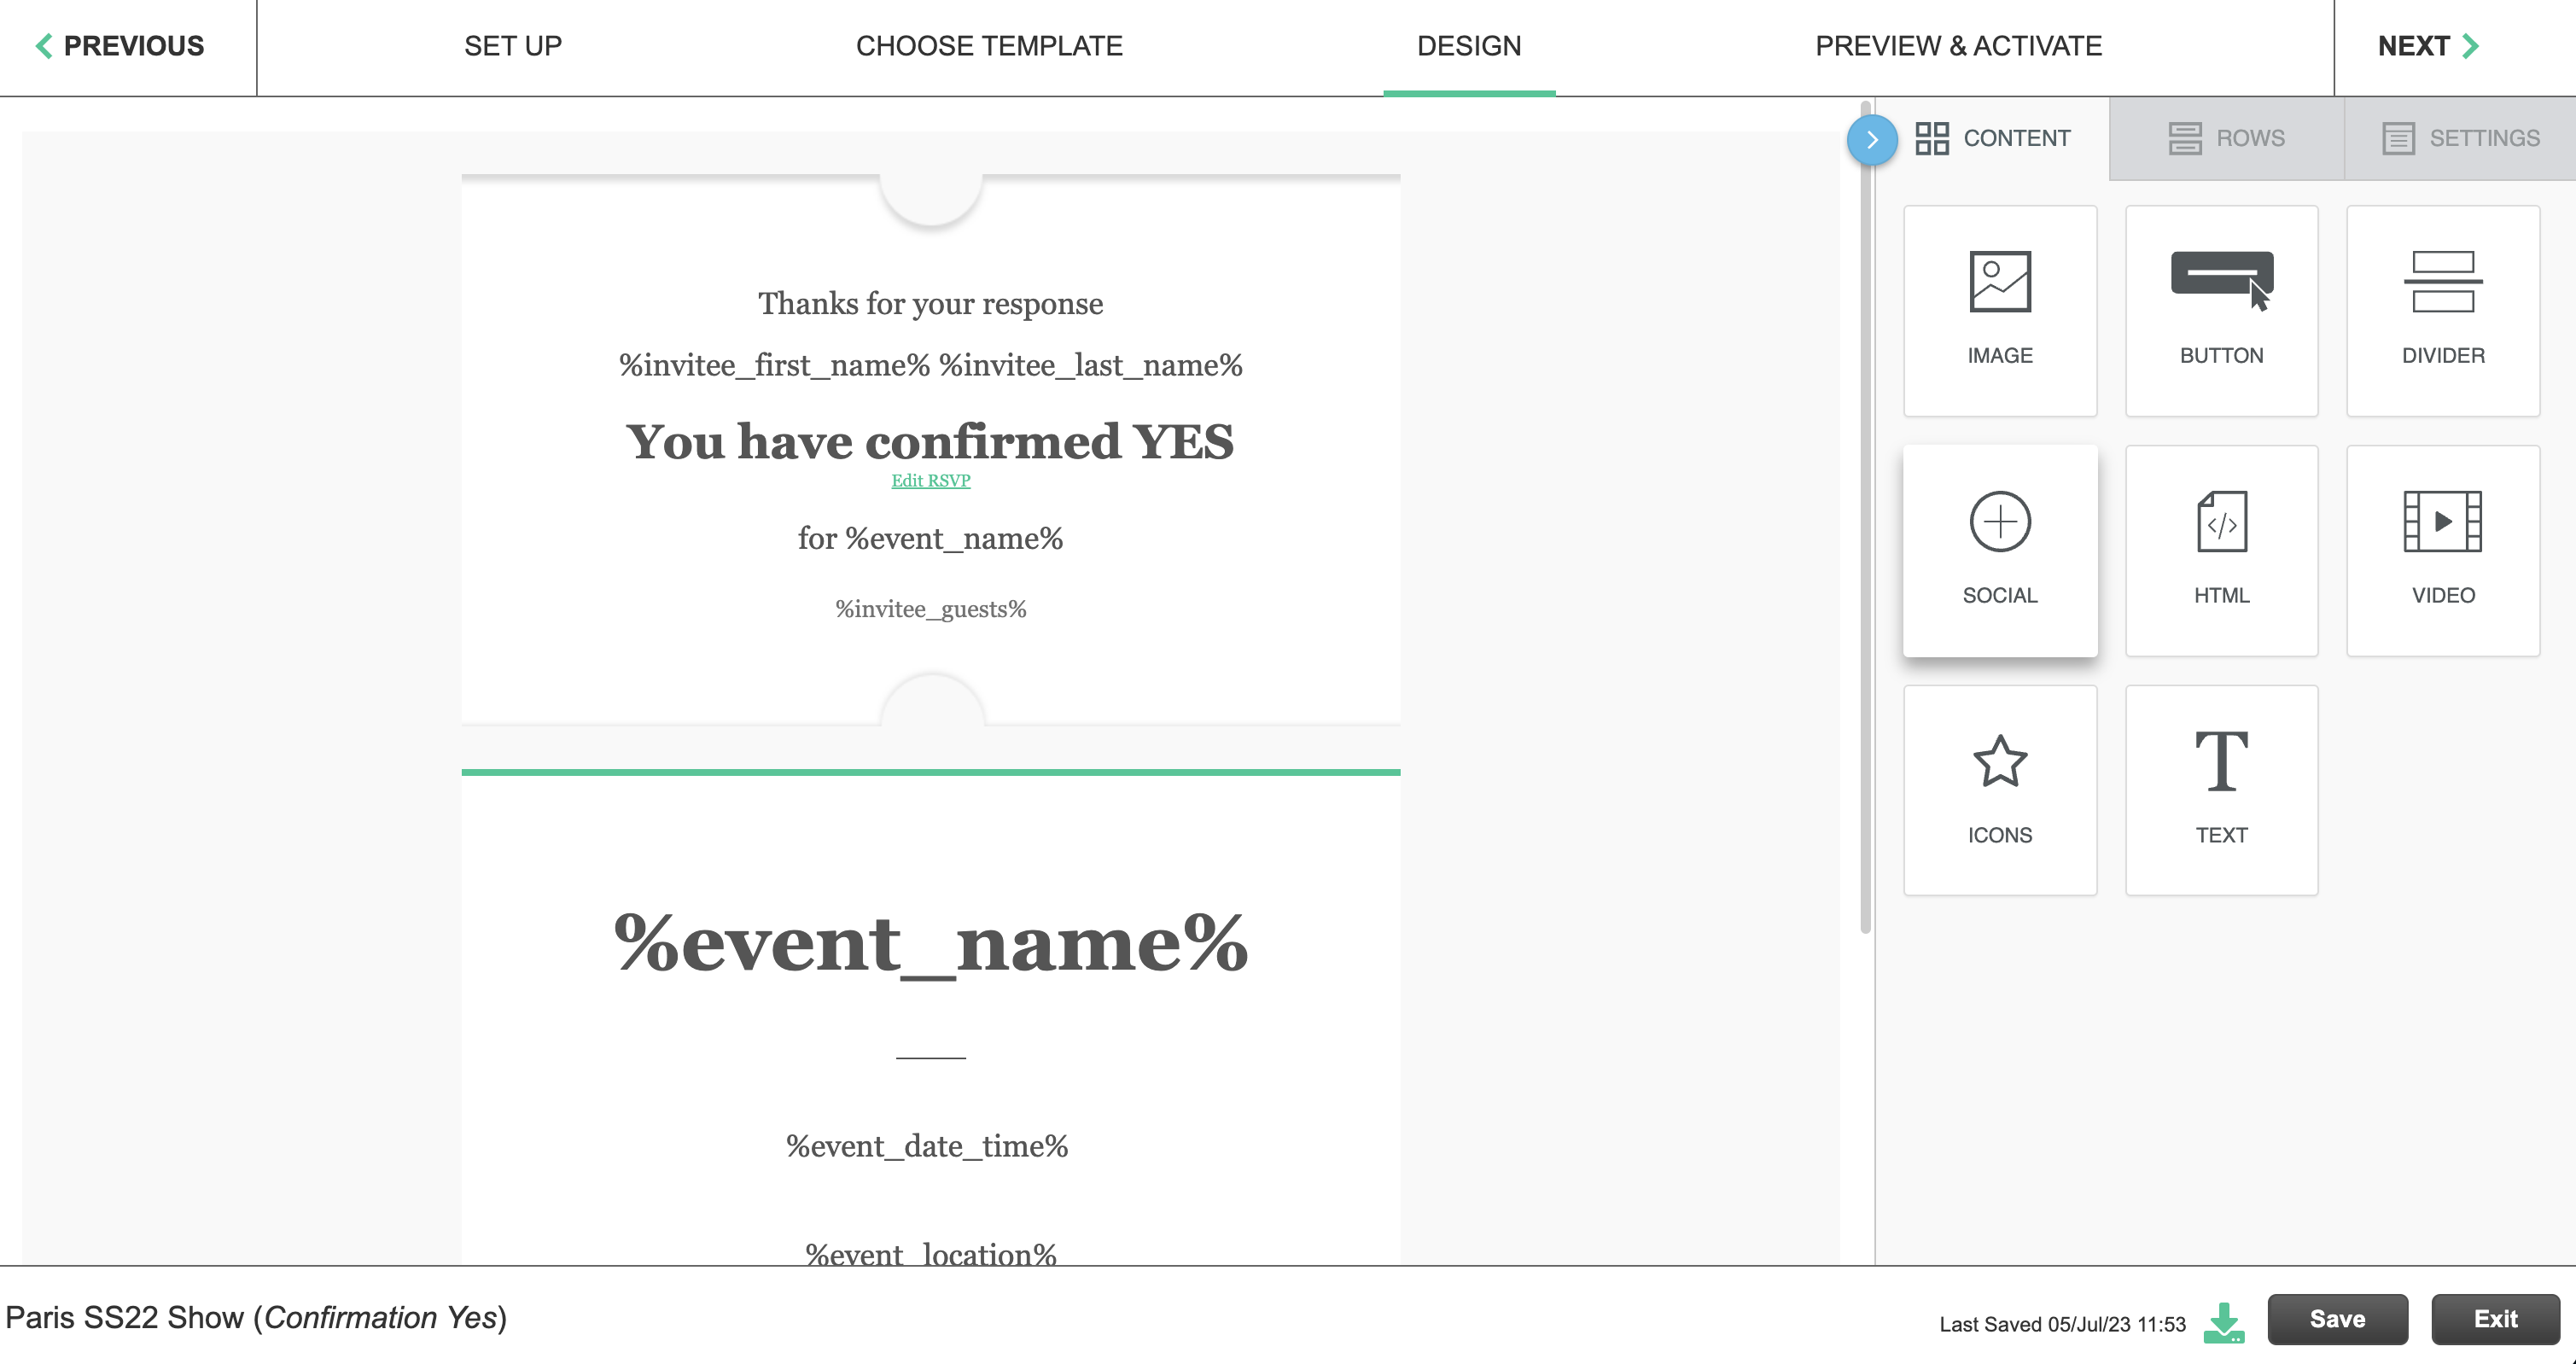
Confirmation Yes
When an invitee confirms "Yes" to an event it will send this email automatically to confirm their attendance.
Confirmation No
When an invitee confirms "No" to an event it will send this email automatically to confirm they are not attending.
Guest Confirmation Yes
When the invitee guest confirms "Yes" to an event it will send this email automatically to confirm their attendance.
Check-In
This email will get sent automatically to all invitees that get check in the day of the event through the GPS Event App. This is the only automated email that is not enabled by default.
Managing automated email templates
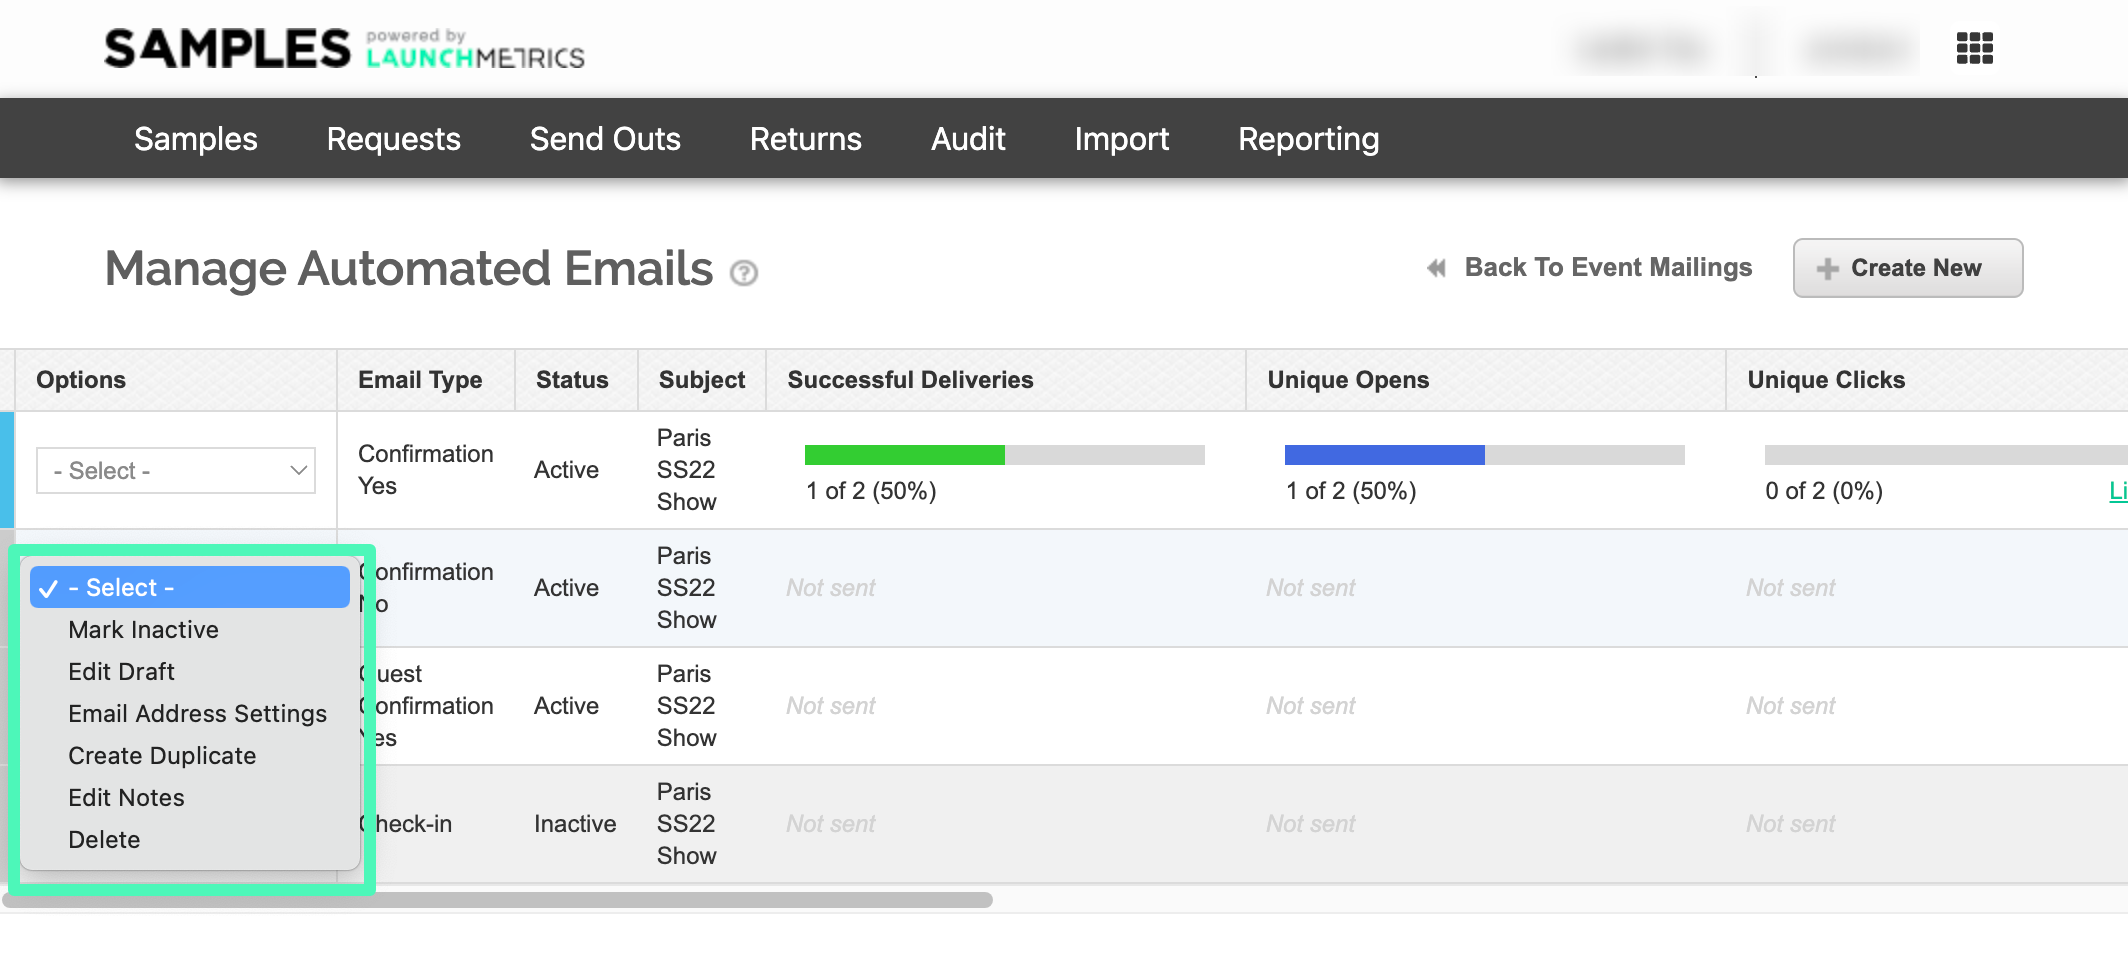
Mark Active or Inactive
This feature allows you to turn on off off the automatic emails from being sent. Note that you can only activate one template per type. i.e. You can only activate one Confirmation Yes, Confirmation No, Guest Yes, Check-in template at a time.
Edit Draft
Allows you to edit the design of the email.
Note that if there was already at least 1 recipient, the design of that template cannot be edited. In order to change the design for future recipients, you'll need to duplicate or create a new template of that same email type, mark the previous design as Inactive and Activate the new one.
Email Address Settings
Allows you to choose which contact email addresses you wish to use to send them the email.
Note that if there was already at least 1 recipient, the Email Settings of that template cannot be edited. In order to change the settings for future recipients, you'll need to duplicate or create a new template of that same email type, mark the previous email template as Inactive and Activate the new one.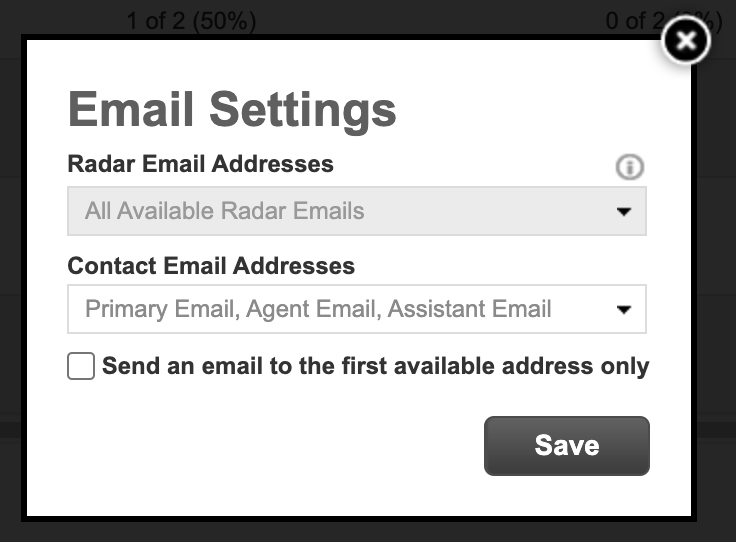
Create Duplicate
This will create a duplicate copy of the original mailing.
Creating a new automated email template
Creating a new automated email from scratch is an option when you want to update the design or settings of any of the default automated emails. You would really only need to do this if the email template that was created by default was already sent to some recipients. If nobody has received the default automated email templates, you can simply edit the ones already created.
Edit Notes
Allows you to edit any internal notes regarding the mailing template. This is useful in case you have created duplicate or new Email Templates. Use this to describe what the differences are.
Delete
Allows you to delete the mailing template including the design and all data around recipients. This action cannot be undone!