Why auditing your inventory is key?
Conducting regular inventory audits offers numerous benefits and advantages for each department within your organization.
Firstly, audits significantly reduce sample loss by ensuring precise tracking and accountability of all items, helping maintain an organized and efficient inventory system.
They facilitate the archiving of collections, making it easier for teams to retrieve and reference past designs for inspiration, quality control, or historical records, thereby preserving the brand's heritage and creativity.
Additionally, regular audits help identify discrepancies between recorded and actual stock levels, enabling timely corrections and preventing costly errors. This process optimizes inventory levels, ensuring there is neither overstock nor stockouts, enhancing the overall supply chain efficiency.
Regular audits also improve financial accuracy by providing a clear picture of inventory value and preventing financial discrepancies.
Moreover, they support compliance with regulatory requirements and internal policies, ensuring the company adheres to industry standards.
Audits can also lead to process optimization between departments. By providing detailed insights into inventory usage and movement, audits highlight areas where workflows can be improved, fostering better coordination and communication across departments. This cross-departmental collaboration ensures that resources are utilized more effectively, aligning efforts towards common business goals.
Ultimately, these benefits lead to cost savings, more efficient resource management, and a streamlined operation that can better respond to market demands and customer needs.
How to perform an audit?
1. Create an audit
You can access audits created on your desktop from your mobile application and vice versa.
From Desktop
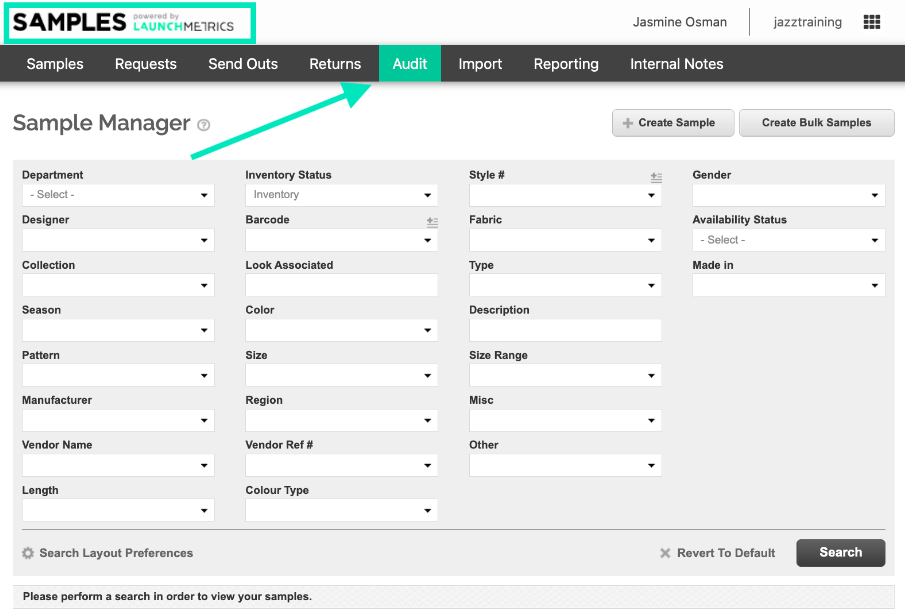
To conduct an Audit, go to the Audit page in the navigation menu
Then, click on Create New Audit.
From Samples Mobile application
From your Samples Mobile application, open the More menu, and select the Audit page.
Click on Create New Inventory Audit.
2. Audit Definition
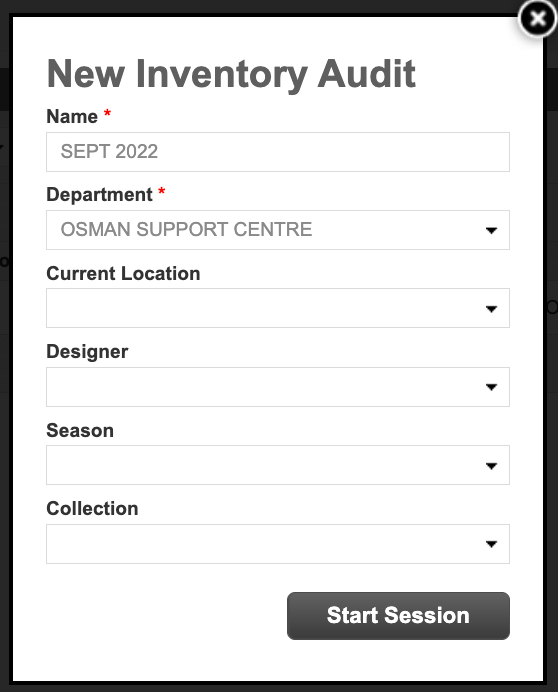
You'll need to define the inventory subset you want to perform an audit on.
-
Name: Define the name of the audit so you can easily find it and return to it when needed.
- i.e. End of Season Audit.
-
Department: Select the department for which you want to verify the inventory.
- Audits can be performed on a single department at a time.
- Current Location: If your samples should be in a specific location, you can select the precise one you're auditing.
-
Designer, Season, or Collection: If your department manages multiple designers, seasons, or collections at a time, you can select the precise stock you want to audit within your whole inventory.
- If you know that your closet should only include items from the current season, specify it here so the audit can call out items left behind from a previous season.
Required fields are denoted by a red asterisk (*).
Click on Start Session (or Done from your mobile application) to begin your audit.
3. Scan Samples
Process with your audit by scanning all the samples you have on hand.
You can choose to reset your session at any time. This will clear any scanned samples and allow you to start the session again.
From Desktop
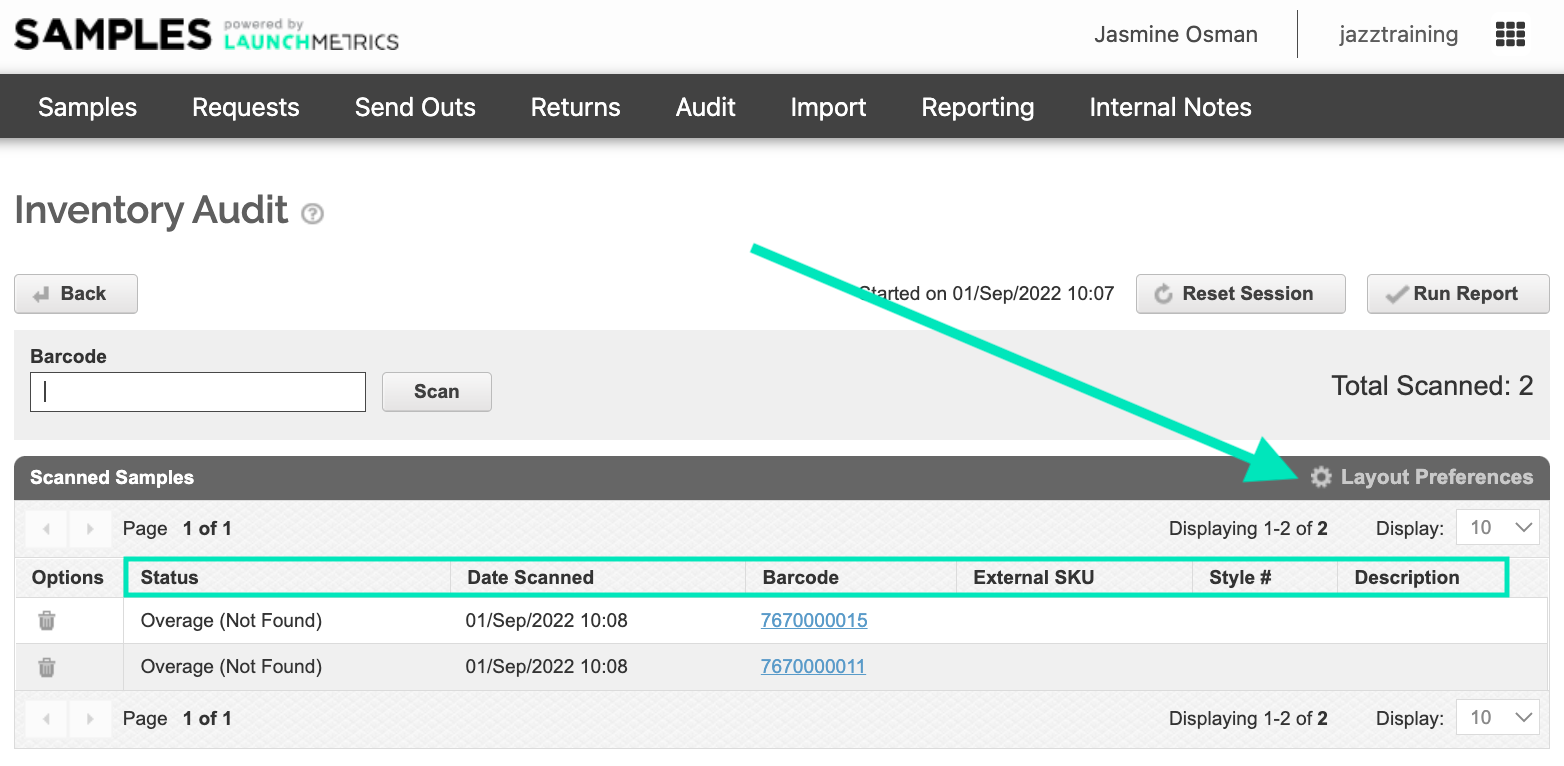
You can do this directly in the Audit page
- by typing the barcodes of the samples, and hit Scan
- by scanning the barcodes of the samples using a handled Zebra scanner to read barcodes from the samples' labels
- Make sure your mouse cursor is within the Barcode input field
You can choose your Layout Preferences to display the fields you wish to see on this page.
From Samples Mobile application
You can scan using your phone camera or handheld Zebra scanner connected to our application
4. Audit Logs
As you scan, the Scanned Samples log will show the items scanned along with their status. The sample status is an assessment, calculated live, based on your system inventory.
- Overage (Out on loan): the sample was scanned and found in your inventory, but is supposed to be out on loan.
- Found as Available: the sample was scanned, found in your inventory, and not found on loan.
- Overage (Not found): the sample was scanned but not found in your inventory.
Audit logs are only available on desktop.
5. Run Report
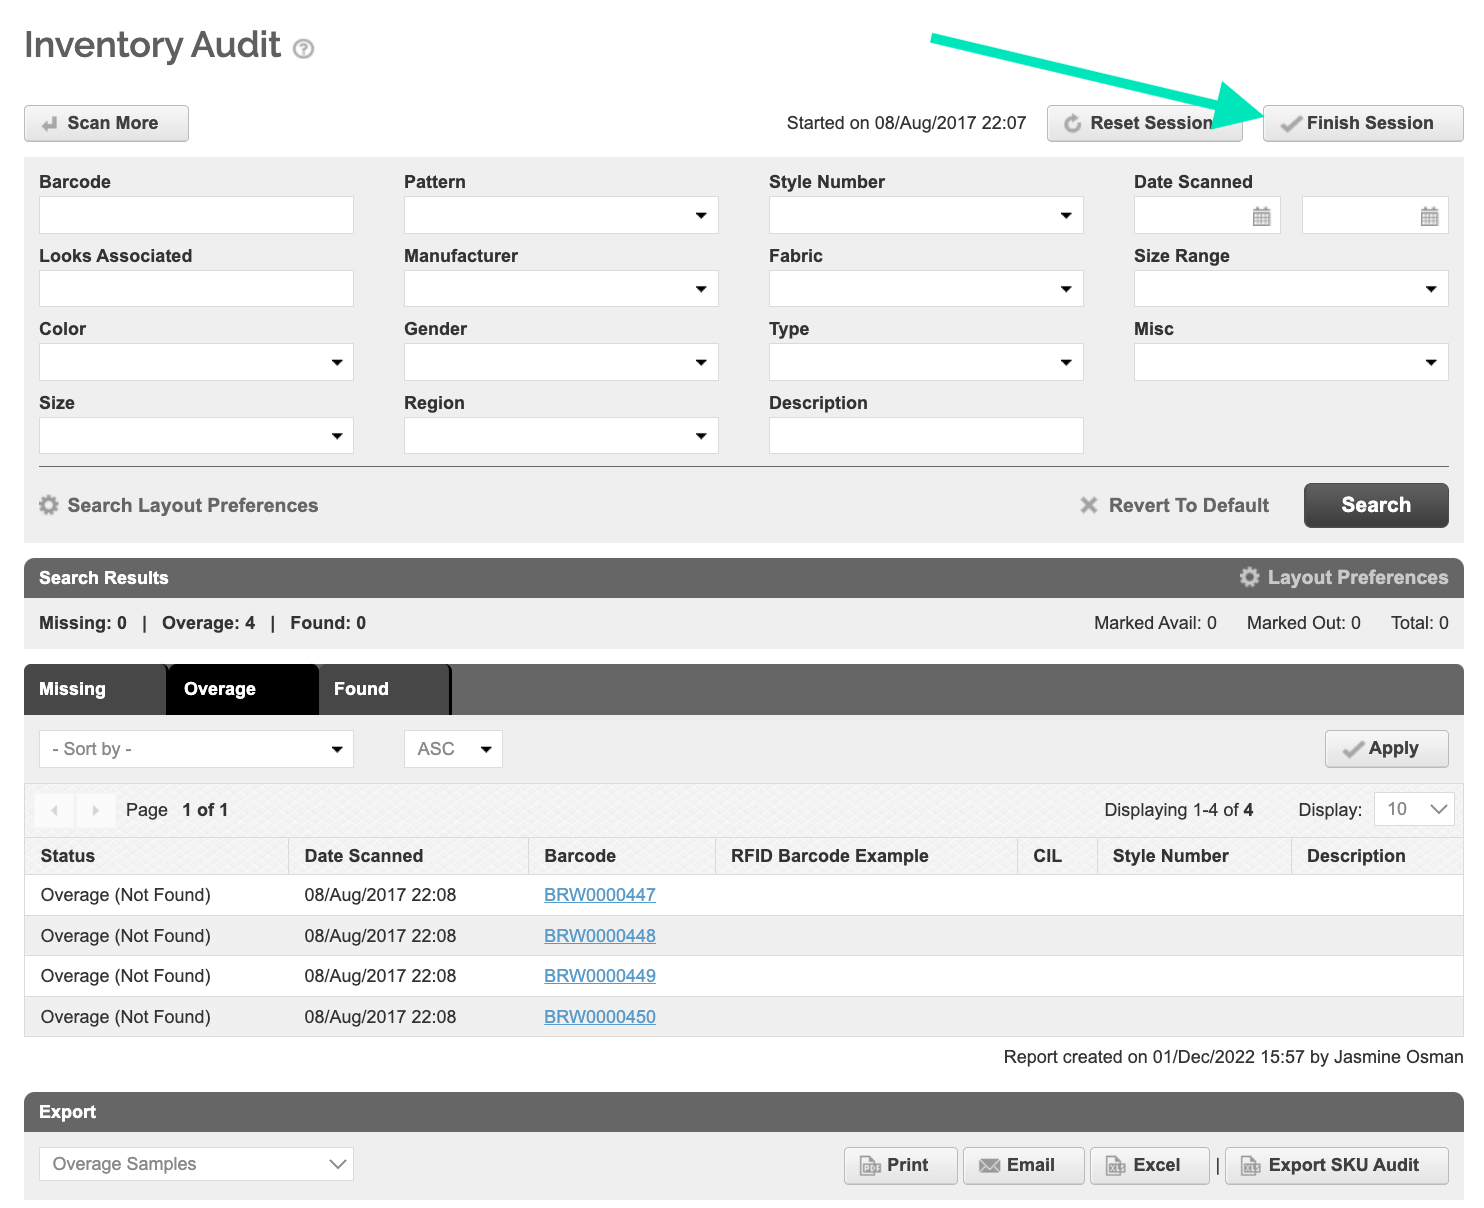
Once you are done scanning your samples, you can click Run Report to get the full details of the audit. The system will assess all the items scanned & not scanned and compare them with your live inventory & current send outs.
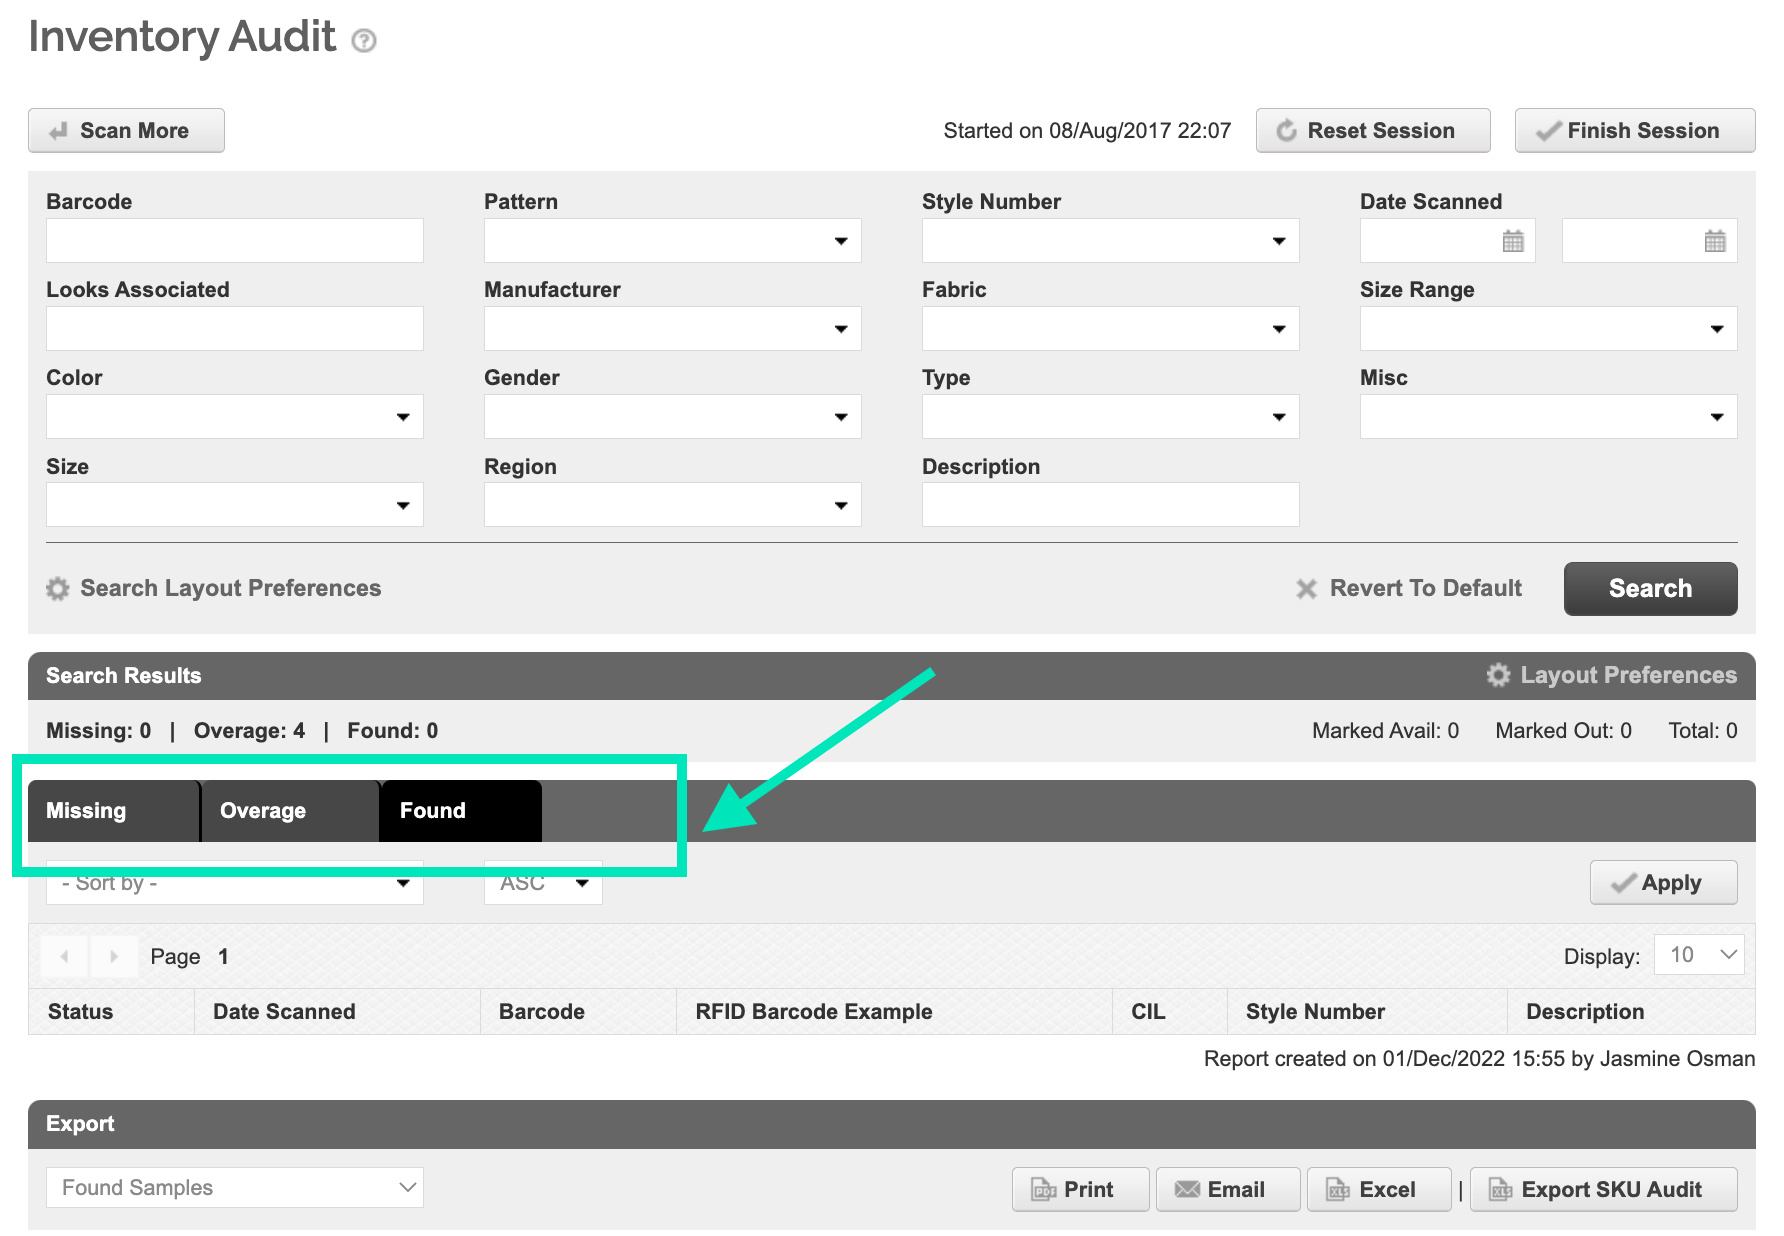
You will see three tabs in your audit report:
- Missing: Samples that should be available, but were not scanned and accounted for.
-
Overage: Samples that shouldn’t be available on hand.
- Overage (On loan): Samples physically scanned but still marked as out on loan indicating that someone on the team did not scan them back when they were first returned.
- Overage (Not Found): Unknown samples which could be samples you have on hand but belong to another department.
-
Found:
- Found (On Hand): Samples correctly scanned and found on hand.
- Found (Out on Loan): Samples not scanned but found on an open send out.
You can easily export your current audit results to PDF or Excel and even send them by email to a collaborator or yourself. You can export the full audit report or focus on a specific status.
Running audit reports is only available on desktop.
6. Finish Session
Once you have scanned all samples, choose Finish Session to end the audit.
Once you Finish Session, this freezes the audit and you will not be able to edit or scan more samples.
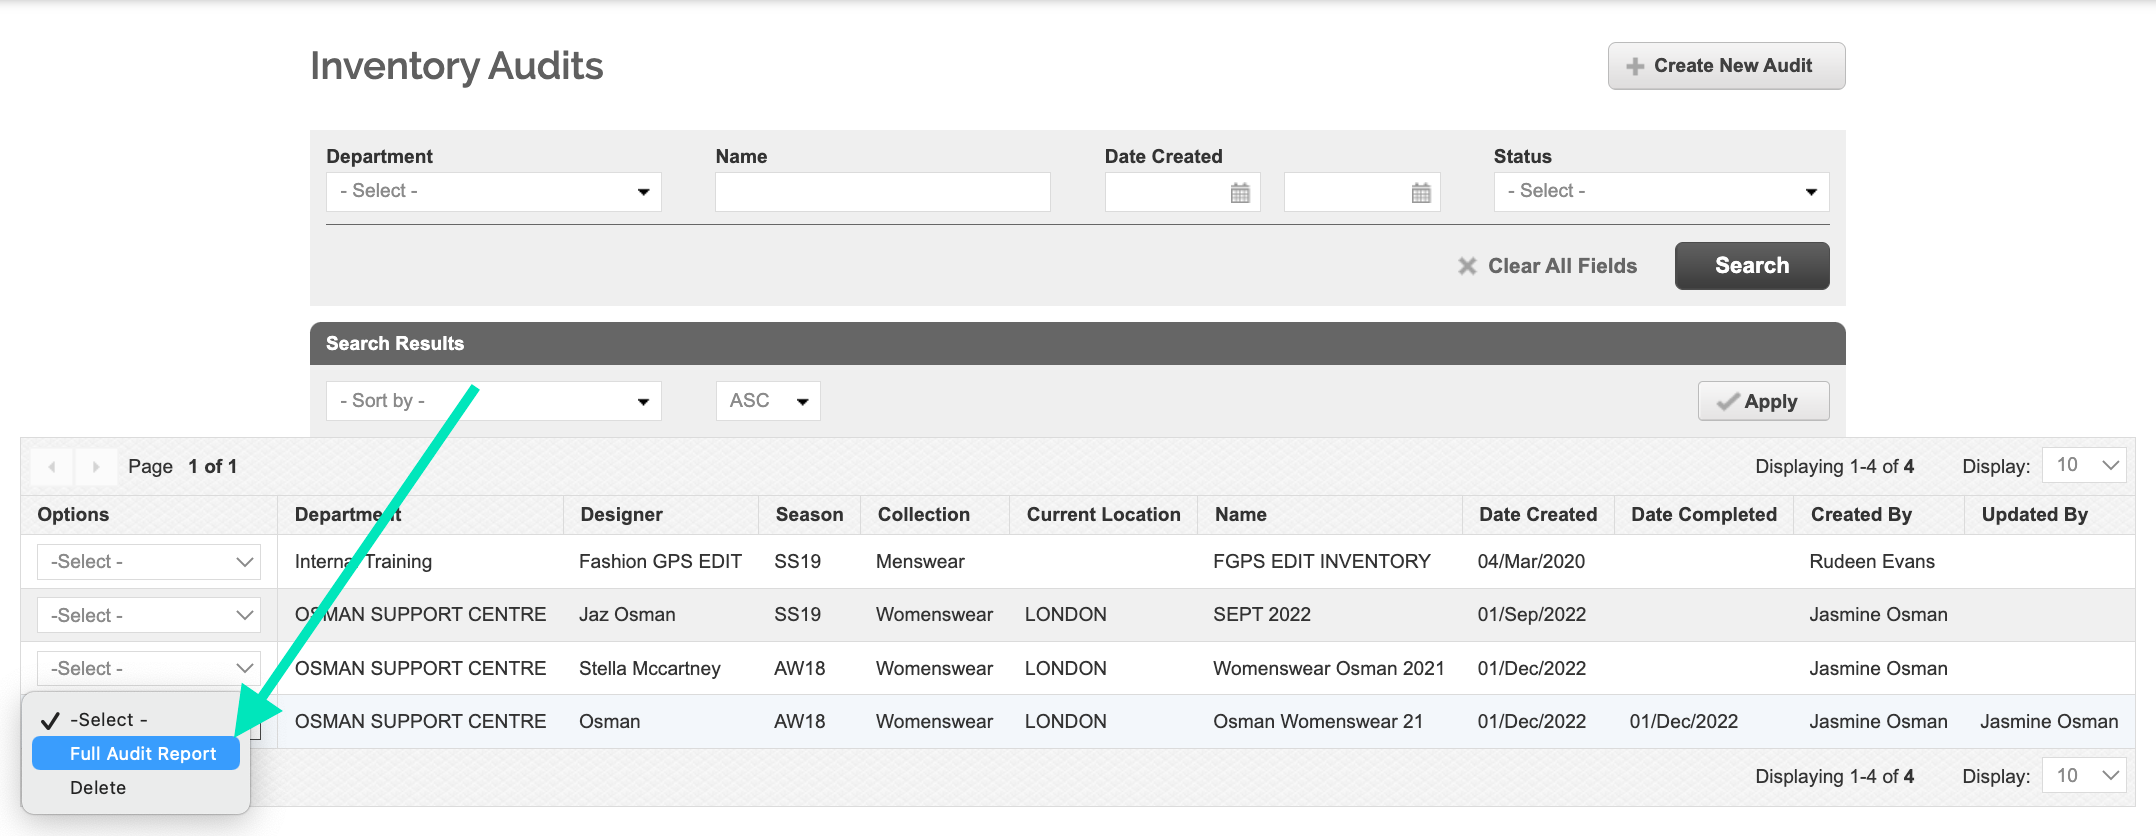
However, you can view and see the Full Audit Report from the Audit page, which will export the details into Excel.
Finishing an audit session and accessing the full audit report are only available on desktop.