
To queue contacts:
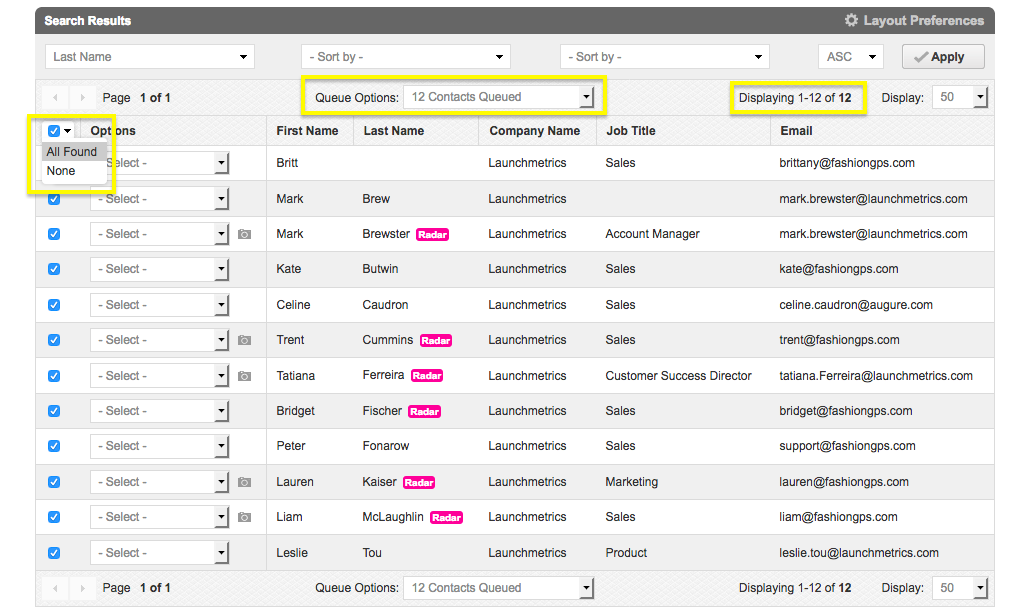
Select the check box in the column to the left of each contact.
To queue all your contacts from a specific search, select the first check box at the top of the search results. This will queue all contacts on that page.
NOTE: The contacts selected will remain queued even if you perform a new search, move to the next page, or log out of your account.
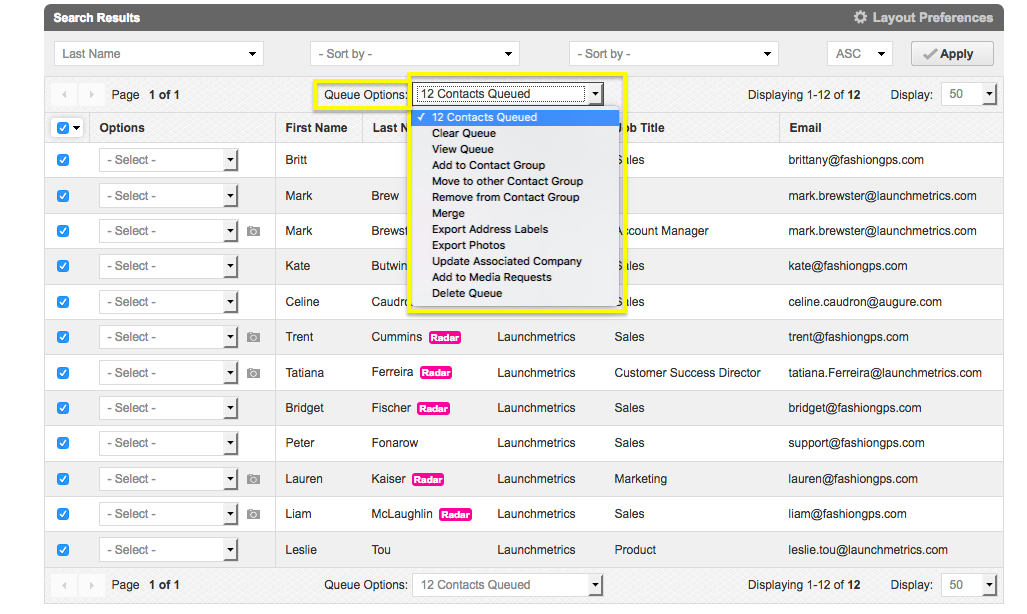
Once you have several contacts selected, click the drop-down menu following the words "Queue Options:" below the Search Results bar. You will see the following options:
Clear Queue: Clear the selection of contacts you have made.
View Queue: Review which contacts have been selected. This can be useful if you have selected from multiple pages. Clicking the X below the Options column will remove the contact from your queue.
-
Add to Contact Group: Create a contact group for the selected contacts or add them to an existing group.
-
Move to other Contact Group: Move selected contacts to an existing contact group.
- Remove from Contact Group: Remove selected contacts from an existing contact group.
Merge: Merge the selected contacts into one contact. You will have to select the contact/column with the most amount of accurate information by clicking the small circle to the left of their name. Then, you can select specific boxes from either contact's column to be used in the final version. The selected contact details will be highlighted in blue. You can also edit the information by typing directly into the fields you wish to change.
Export Address Labels: Generate a PDF of contact and associated company address labels. You can change what information is included by clicking the "Create Template" button.
Export Photos: Create a PDF of your contacts' photos, full name and affiliation. You can change the size of the photos by creating a new template. Click "Layout Preferences" to select what information is included for each contact.
Update Associated Company: Change the company these contacts are associated with. You can decide to change only the company name, or the company and address details.
- Delete: Permanently delete the selected contacts.
NOTE: We strongly recommend against deleting contacts, as this action will delete their entire history and cannot be undone.