컴퓨터에 프린터를 성공적으로 설치하고 QZ 트레이를 설치했으므로 이제 프린터를 Launchmetrics의 샘플 애플리케이션에 연결해야 합니다.
-
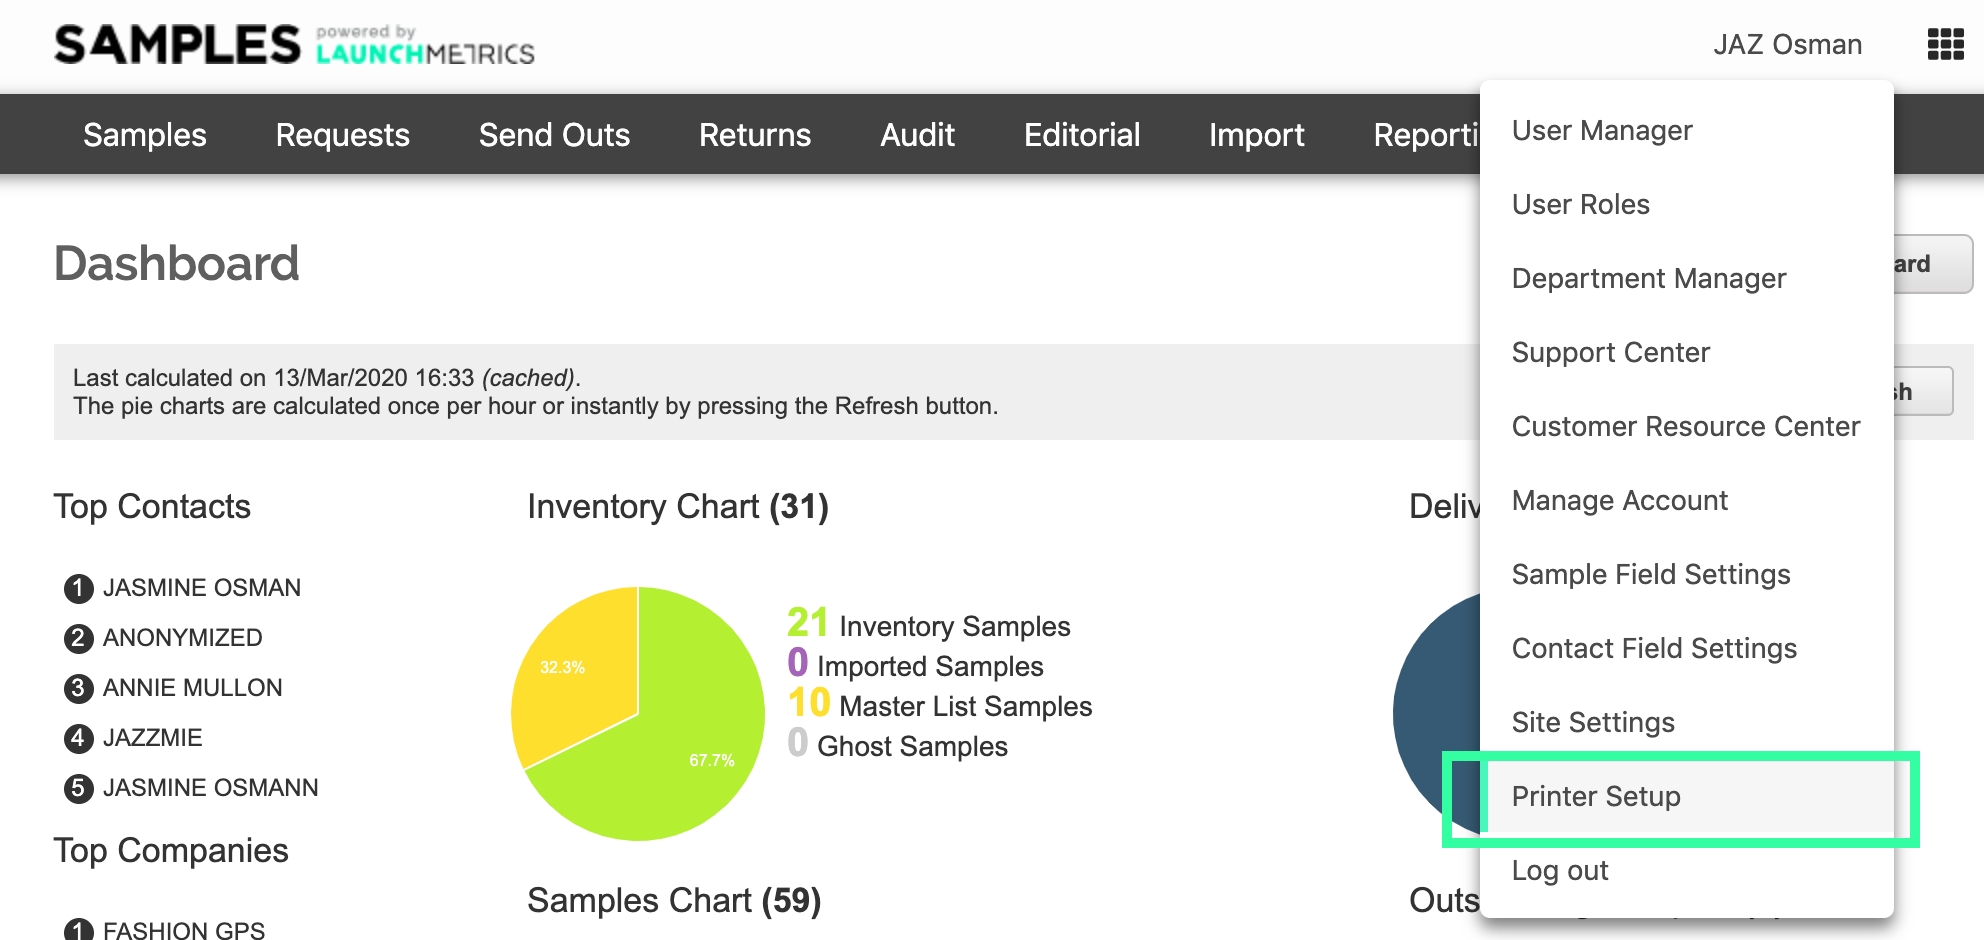
Launchmetrics 사이트로 이동하여 오른쪽 상단 모서리에 있는 사용자 이름을 클릭합니다.
-
" Printer Setup (프린터 설정) "을 선택하면 새 페이지로 이동합니다.

-
" Printer Setup (프린터 설정) "을 선택하면 새 페이지로 이동합니다.
-
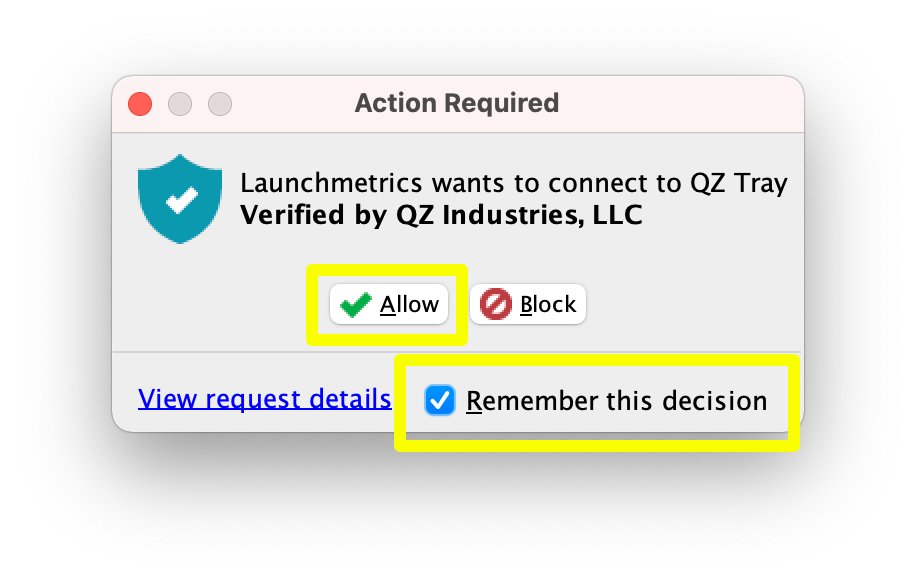
QZ 트레이에 연결을 허용할지 묻는 팝업이 표시됩니다.
- " Remember this decision (선택사항을 기억하기) "를 선택합니다. (이를 선택하지 않을 경우,인쇄할 때마다 허용해야 합니다).
- 그런 다음 " Allow (허용) " 을 클릭합니다.

-
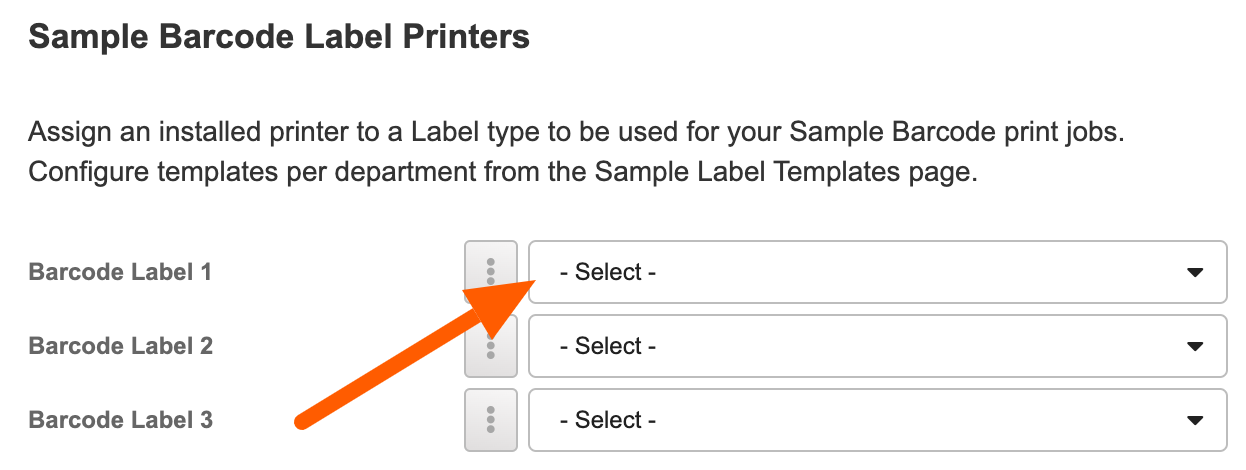
샘플 바코드 라벨 프린터 섹션에는 3가지 라벨 유형이 표시됩니다. 하나 이상의 라벨 유형에서 방금 설정한 프린터를 선택합니다. 이 프린터는 " Barcode " 또는 " TLP2824 "라고 할 수 있습니다.
바코드 레이블 유형에 대한 참고 사항: 레이블 유형은 본질적으로 Launchmetrics CSM 또는 구현 전문가가 부서에 대해 구성한 템플릿을 참조합니다. 어떤 라벨 유형을 사용할지 확인하려면 그들에게 확인하세요. 하지만 최소한 Barcode Label Type 1 이 될 가능성이 큽니다.
-
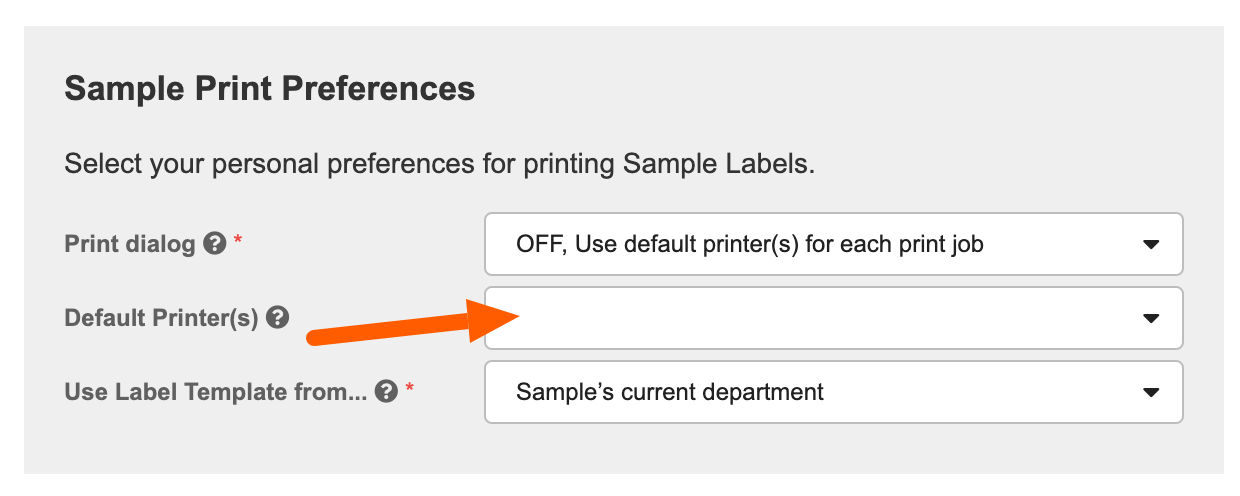
" Sample Print Preference (인쇄 기본 설정) " 섹션의 " Default Printer(s) (기본 프린터) " 를 아래에서 방금 선택한 동일한 프린터를 선택합니다.

- 페이지 하단의 설정 저장을 클릭하면 인쇄할 준비가 완료됩니다.
테스트 인쇄 방법을 알아보려면 샘플 시작하기 문서를 참조하십시오.