
Sending Seating Assignments
Follow these steps to send seat assignments to your invitees

- Click “Preview” to double check that you are satisfied with your final email template. Be sure you have the "RSVP Seating Email Template" selected. Confirm there is a barcode and seat assignment present in the preview.
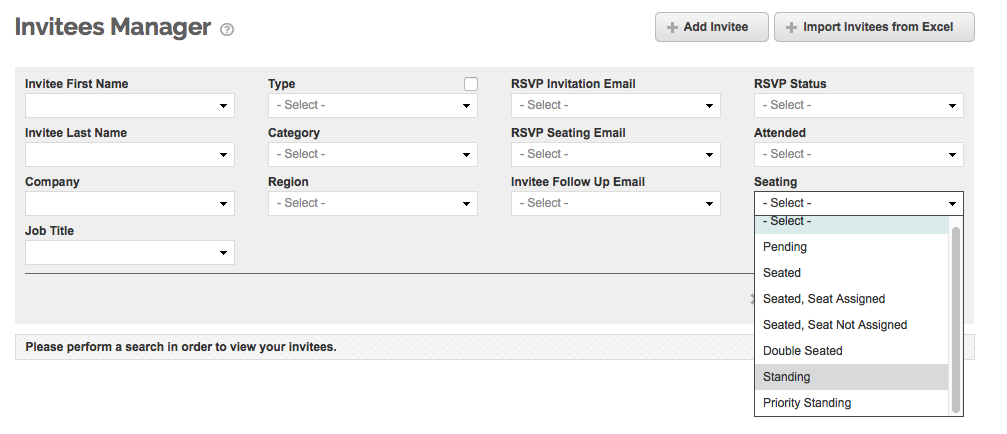
- Go into Invitees Manager and search for only your invitees with Seats (or Standing/Priority Standing).
- Queue the invitees by clicking on the upside down triangle to the top left of your invitee list and select "All Found". Repeat this for standing and priority standing invitees if you're sending to these invitees as well.
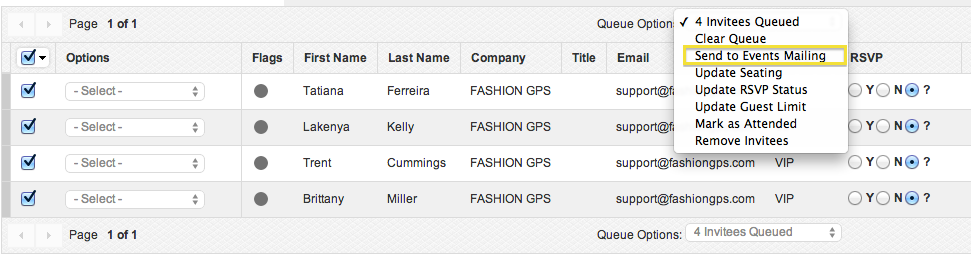
- Once they're all queued up, from the Queue Options drop-down menu select "Send to Events Mailing". This will redirect you to the Events Mailing page.
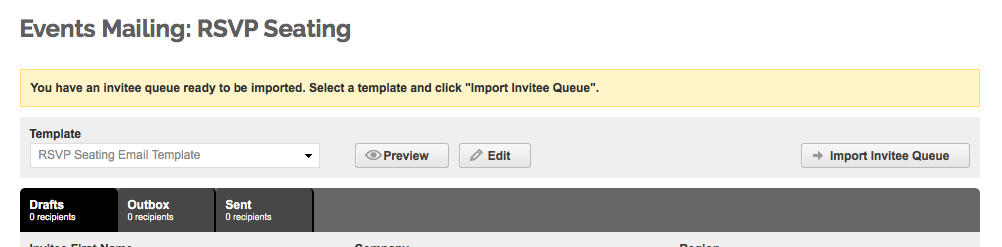
- Click the “Import Invitee Queue” button to populate all queued Invitees at the bottom of the page.
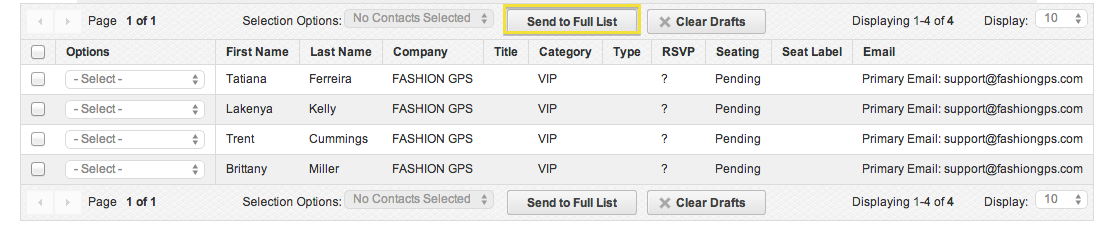
- Either individually queue up recipients and select “Send Email” from the Queue Options drop-down menu or click “Send to Full List”.
Monitor the status of your mailings in this same page.
Outbox tab: Shows all emails that are in the process of being sent out. They have not yet left the system.
-
Sent tab: Shows emails that have been confirmed as successfully sent. You can review the sent email recipients from this tab and the time the email was opened.
- Delivery Response: Allows you to search via the status of your emails. Processing means that the Fashion GPS server is awaiting confirmation from the email recipient's server on the delivery status.
- NOTE: Review what each Delivery Response mean in this article: Failed Email Explanations!